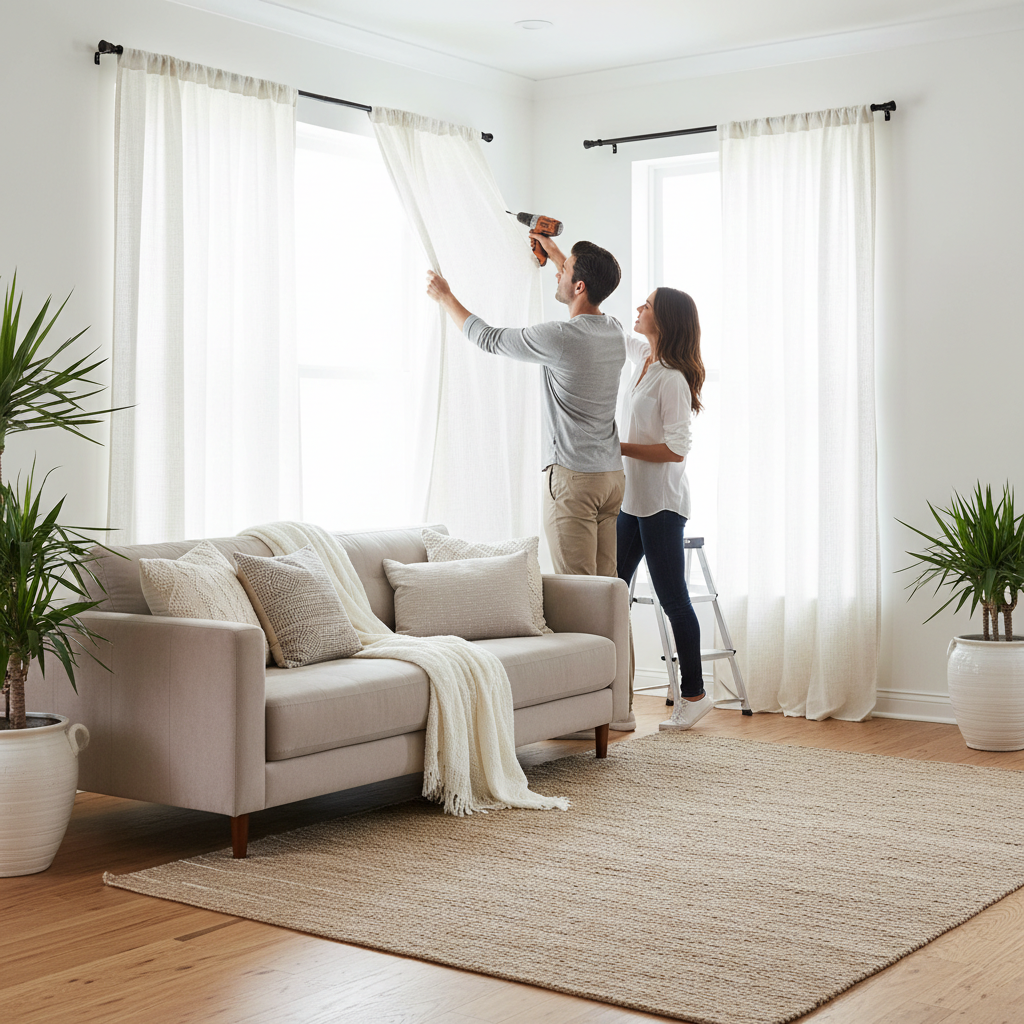
Curtains do so much more than just cover your windows. They’re a crucial element in home design, offering privacy, light control, insulation, and a significant boost to your room’s aesthetic. Whether you’re moving into a new home, redecorating an existing space, or simply want to refresh a room, knowing how to hang curtains correctly can make a world of difference. It’s a DIY project that might seem daunting at first, but with the right guidance, you’ll find it’s quite manageable and incredibly rewarding.
Properly hung curtains can make a room feel taller, wider, and more luxurious. Conversely, curtains that are hung too low, too narrow, or with the wrong length can make a space feel cramped and unfinished. In this comprehensive guide, we’ll walk you through everything you need to know, from choosing the right curtains and hardware to the step-by-step installation process, ensuring your windows look their absolute best.
Why Proper Curtain Hanging Matters for Your Home
Before we dive into the “how-to,” let’s briefly touch on why paying attention to the details of curtain hanging is so important. It’s not just about aesthetics; there are practical benefits too:
- Enhanced Aesthetics: Well-hung curtains frame your windows beautifully, adding texture, color, and softness to a room. They can tie together your decor and create a cohesive look.
- Illusion of Space: Strategically placed curtains can make your windows appear larger and your ceilings taller, creating a more expansive feel in any room.
- Light Control: The right curtains and hanging method allow you to precisely control the amount of natural light entering your home, from full sun to complete blackout.
- Privacy: Curtains are essential for maintaining privacy, especially in bedrooms and bathrooms.
- Insulation: Heavier curtains can provide an extra layer of insulation, helping to keep your home warmer in winter and cooler in summer, potentially saving you money on energy bills.
- Increased Home Value (Subtly): While not a direct value-add like a kitchen renovation, a home that looks polished and well-maintained, down to its window treatments, presents better to potential buyers. It shows attention to detail and care, which can make a positive impression.
Choosing the Right Curtains and Hardware
The first step in learning how to hang curtains is selecting the right materials. This involves considering the fabric, style, length, width, and the hardware that will support them.
Curtain Style and Fabric
The style and fabric of your curtains should complement your room’s decor and serve its primary function. Here are a few popular options:
- Sheer Curtains: These are lightweight and translucent, allowing plenty of natural light while offering a touch of privacy. Great for living rooms or dining areas where you want brightness.
- Linen Curtains: Offering a relaxed, natural look, linen provides moderate light filtering and a lovely texture.
- Cotton Curtains: Versatile and easy to care for, cotton comes in various weights and weaves, suitable for almost any room.
- Velvet Curtains: Luxurious and heavy, velvet offers excellent light blocking, insulation, and a sophisticated feel, perfect for bedrooms or formal living spaces.
- Blackout Curtains: Designed with a special lining, these completely block out light, ideal for bedrooms, nurseries, or media rooms.
- Thermal Curtains: Often made with multiple layers or a specific lining, these are designed to improve insulation and reduce energy loss.
Determining Curtain Length and Width
This is where many people make mistakes. Getting the right dimensions is crucial for a professional look.
Curtain Length:
Measure from where your curtain rod will be installed down to the floor. Here are common length preferences:
- “Kissing” the Floor: The most popular and modern look. The curtain barely touches or “kisses” the floor. This requires precise measurement.
- Puddling: The curtain fabric pools slightly on the floor (an extra 2-6 inches). This creates a romantic, luxurious, or bohemian look, but can be impractical for high-traffic areas or if you have pets.
- Window Sill Length: The curtain ends just above or at the window sill. This is often used in kitchens, bathrooms, or rooms where you need easy access to the sill, but it can make a room feel less grand.
Rule of thumb: Always round up to the nearest standard curtain length (e.g., 84″, 96″, 108″, 120″). It’s better for curtains to be slightly long than too short.
Curtain Width:
To ensure your curtains look full and can cover the window properly when closed, they need to be wider than your window. Measure the width of your window (including any trim) and multiply that number by 1.5 to 3 times. The fuller you want the curtains to look, the higher that multiplier should be.
- 1.5x to 2x: A good starting point for a moderate fullness.
- 2.5x to 3x: For a very lush, luxurious look, especially with sheer or lightweight fabrics.
If you have multiple curtain panels, their combined width should meet this recommendation.
Choosing Curtain Hardware
The hardware includes the curtain rod, finials (decorative ends), and brackets. These should complement your room’s style and be sturdy enough to support the weight of your chosen curtains.
- Curtain Rods: Available in various materials (metal, wood, plastic) and finishes. Choose a diameter appropriate for the weight of your curtains – heavier curtains need thicker rods to prevent sagging.
- Finials: Decorative caps for the ends of the rod. They come in countless styles, from simple caps to elaborate designs.
- Brackets: These hold the rod to the wall. Ensure they are strong and long enough to allow the curtains to hang freely without hitting the window frame or wall. For wider windows, you might need a center support bracket to prevent sagging.
- Curtain Rings or Hooks: If your curtains don’t have grommets or a rod pocket, you’ll need rings with clips or hooks to attach them to the rod.
Gathering Your Tools and Materials
Before you start drilling, make sure you have everything you need. This will make the installation process much smoother.
Essential Tools:
- Measuring Tape: Absolutely crucial for accurate measurements.
- Pencil: For marking drilling spots.
- Level: To ensure your curtain rod is perfectly straight. A laser level is ideal, but a traditional bubble level works just fine.
- Drill: With appropriate drill bits for your wall type (wood, drywall, plaster).
- Screwdriver: To secure screws if not using a drill for the final tightening.
- Stud Finder: Highly recommended to locate wall studs for secure mounting, especially for heavy curtains.
- Wall Anchors/Drywall Anchors: If you can’t drill into a stud, these are essential for providing a secure hold in drywall.
- Step Ladder or Stool: To reach above your windows safely.
- Safety Glasses: Always a good idea when drilling.
Materials You’ll Have Already Chosen:
- Your chosen curtains
- Curtain rod
- Finials
- Brackets
- Curtain rings/hooks (if needed)
Step-by-Step Guide: How to Hang Curtains Like a Pro
Now, let’s get to the actual installation. Follow these steps for a polished, professional result.
Step 1: Determine Rod Placement (The 2-4-6 Rule)
This is arguably the most critical step for achieving that “designer” look. Forget hanging the rod right above the window frame. To make your windows look larger and your ceilings taller, follow these guidelines:
- Height: Hang your curtain rod 4 to 6 inches above the window frame. For very high ceilings, you can even go up to 10-12 inches above the frame, or halfway between the top of the window and the ceiling. The goal is to draw the eye upward.
- Width: Extend your curtain rod 6 to 12 inches beyond the window frame on each side. This allows the curtains to be pulled back completely, revealing the full window and maximizing natural light. When the curtains are open, they should rest on the wall, not cover the window glass.
So, a good general rule of thumb is to aim for at least 4-6 inches above the window frame and 6-12 inches beyond the frame on each side. Mark these points lightly with your pencil.
Step 2: Measure and Mark Bracket Positions
Once you’ve determined your rod placement, it’s time to mark exactly where your brackets will go.
- Measure Height: Measure from the floor up to your desired rod height. Mark this point on the wall on both sides of the window.
- Measure Width: Measure from the window frame outward to your desired rod extension on both sides.
- Position Brackets: Hold a bracket up to your marked spots. Use your pencil to mark the specific screw holes for each bracket.
- Check for Level: Use your level to ensure your marked points for both brackets are perfectly even. This is crucial! An uneven rod will be very noticeable.
- Consider Center Support: If your curtain rod is particularly long (over 60-70 inches) or your curtains are heavy, you’ll likely need a center support bracket to prevent the rod from sagging. Mark its position in the middle of the window, ensuring it’s at the same height as the side brackets.
Step 3: Locate Studs or Use Wall Anchors
For a secure installation, especially with heavy curtains, drilling into a wall stud is ideal. Use a stud finder to locate studs behind your marked screw holes.
- If you find a stud: Drill a pilot hole slightly smaller than your screw, then screw the bracket directly into the stud.
- If you don’t find a stud: You *must* use wall anchors (also called drywall anchors) to ensure the brackets are secure. Drill a hole according to the anchor manufacturer’s instructions, insert the anchor, and then screw the bracket into the anchor. Skipping anchors can lead to your curtains falling down, damaging your wall, and potentially your curtains.
Expert Tip: Always read the instructions that come with your specific wall anchors, as installation methods can vary.
Step 4: Install the Brackets
With your holes drilled and anchors (if needed) in place, it’s time to attach the brackets to the wall. Use your drill or screwdriver to securely fasten each bracket. Don’t overtighten, but make sure they are snug and stable.
Step 5: Prepare Your Curtains
Before hanging, it’s a good idea to iron or steam your curtains, especially if they’ve been folded in packaging. This removes creases and allows them to hang beautifully. If your curtains are new, check the care instructions; some may need to be washed before hanging.
Step 6: Thread Curtains onto the Rod
The way you thread your curtains depends on their style:
- Rod Pocket: Simply slide the rod through the pocket sewn at the top of the curtain.
- Grommet: Thread the rod through the metal grommets. Make sure the last grommet on each end is on the outside of the bracket to keep the curtain from sliding off.
- Tab Top: Slide the rod through the fabric loops (tabs) at the top.
- Back Tab: Similar to tab top, but the tabs are on the back, creating a pleated look from the front.
- Pinch Pleat/Hook and Ring: If your curtains have pinch pleats or a heading tape, you’ll attach curtain hooks to the back, and then hook these onto curtain rings that slide onto the rod. Make sure to space the rings evenly for a neat look.
Step 7: Place the Rod on the Brackets
Carefully lift the curtain rod (with the curtains already threaded) and place it into the installed brackets. Secure the rod in place according to your hardware’s design (some brackets have small screws to tighten the rod, others simply rest in a cradle).
Step 8: Add Finials
Screw or slide the decorative finials onto the ends of the curtain rod. These complete the look and prevent the curtains from sliding off.
Step 9: Adjust and Style Your Curtains
Step back and admire your work! Now, take the time to adjust the curtains. Even out the pleats or folds, ensuring they hang uniformly. If you have multiple panels, make sure they meet neatly in the middle when closed. If your curtains are “puddling,” arrange the fabric artfully on the floor.
For a truly polished look, consider using tie-backs or hold-backs to gather the curtains when open. This can add another layer of style and keep the fabric neatly out of the way.
Troubleshooting Common Curtain Hanging Issues
Even with the best planning, you might encounter a few hiccups. Here are some common problems and their solutions:
- Curtains are too short: Unfortunately, this is hard to fix without replacing the curtains. Always measure twice and consider buying slightly longer if in doubt.
- Curtains are too long: You can hem them yourself (with a sewing machine or iron-on hemming tape) or take them to a tailor. For a temporary fix, you can use safety pins to create a false hem.
- Rod is sagging: This usually means the rod is too long for its diameter or the curtains are too heavy. Add a center support bracket or replace the rod with a sturdier, thicker one.
- Brackets are loose: If you didn’t hit a stud, the wall anchors might be insufficient or improperly installed. Remove the bracket, repair the wall, and use stronger anchors or try to relocate the bracket to a stud.
- Curtains don’t open wide enough: Your rod isn’t wide enough. Extend the rod further beyond the window frame on each side.
- Curtains look flat/not full enough: You likely didn’t choose curtains wide enough for your window. Remember the 1.5x to 3x width rule. Adding more panels can help.
Beyond the Basics: Advanced Curtain Hanging Tips
Once you’ve mastered the fundamentals of how to hang curtains, you might want to explore some more advanced techniques to truly elevate your space.
- Layering Curtains: Combine sheer curtains for privacy and light filtering with heavier blackout or thermal curtains for full light control and insulation. Use a double curtain rod for this setup.
- Corner Windows: Special corner curtain rods are available, or you can use two separate rods that meet at the corner, with a corner connector.
- Bay Windows: Similar to corner windows, bay window curtain rods are designed with flexible connectors to follow the angles of your bay.
- Ceiling-Mounted Curtains: For a dramatic, floor-to-ceiling look that maximizes the illusion of height, consider mounting your curtain rod directly to the ceiling. This works exceptionally well in rooms with very tall ceilings or to create a feature wall.
- Motorized Curtains: For ultimate convenience, especially with large or hard-to-reach windows, motorized curtain rods can be controlled via remote, app, or smart home system.
Remember, the goal is to create a cohesive and inviting atmosphere. Don’t be afraid to experiment with different styles and fabrics until you find what truly suits your home and personal taste.
Curtains and Your Home’s Value
While curtains themselves aren’t usually included in the sale of a home unless specifically negotiated, the way your home presents itself with well-chosen and properly hung window treatments can significantly impact a buyer’s perception. A home that feels finished, well-maintained, and thoughtfully decorated often fetches a better price and sells faster.
If you’re thinking about selling your home, paying attention to details like curtain hanging is part of staging your home effectively. It creates a warm, inviting atmosphere that allows potential buyers to envision themselves living there. And when it comes to saving money on the sale of your home, every detail counts. SimpleShowing helps you keep more of your hard-earned equity by offering full-service real estate solutions with significant commission savings. Learn more about how you can save when selling your home by visiting our seller services page.
Conclusion
Learning how to hang curtains properly is a valuable skill for any homeowner. It’s a relatively inexpensive way to dramatically improve the look and feel of your rooms, offering benefits from enhanced aesthetics and light control to improved privacy and insulation. By following the steps outlined in this guide – from careful measurement and hardware selection to precise installation and styling – you can achieve a polished, professional finish that elevates your entire home.
So, gather your tools, choose your favorite curtains, and get ready to transform your windows. You’ll be amazed at the difference a well-dressed window can make!