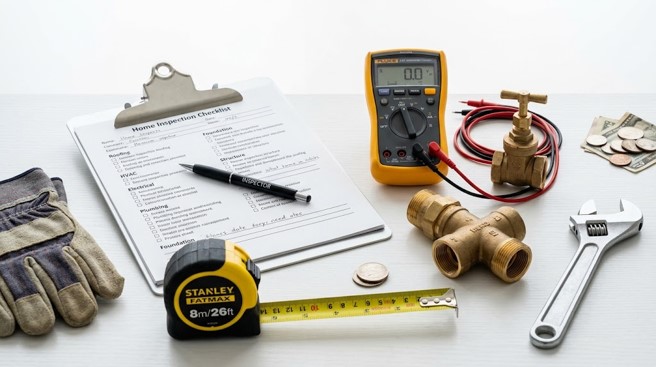
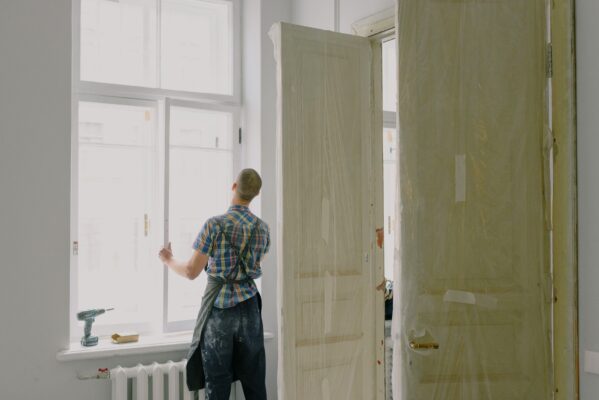
Building your own bookshelf can be a rewarding project, offering a custom storage solution that perfectly fits your space and style. Whether you’re a seasoned DIY enthusiast or just starting out, learning how to build a bookshelf allows you to create a functional and beautiful piece of furniture that can last for years. Beyond the satisfaction of crafting something with your own hands, a custom bookshelf can be more cost-effective than buying a pre-made unit, especially if you have specific dimensions or aesthetic preferences in mind. Plus, it’s a fantastic way to add character and organization to any room in your home.
Why Build Your Own Bookshelf? The Benefits of DIY
You might be wondering why you should invest your time and effort into building a bookshelf when you could simply buy one. The truth is, there are several compelling reasons why a DIY approach often comes out on top:
- Customization: This is arguably the biggest advantage. When you build your own, you’re not limited by standard sizes, finishes, or designs. You can tailor the dimensions to fit an awkward nook, choose materials that match your existing decor, and design shelves to accommodate specific items, from oversized art books to small paperbacks.
- Cost Savings: While high-end custom furniture can be pricey, building a basic, sturdy bookshelf yourself often costs significantly less than purchasing a comparable quality item from a retail store. You control the material costs and labor is free!
- Quality and Durability: Mass-produced furniture can sometimes cut corners on materials and construction. When you build it, you can select high-quality wood or other materials and use robust joinery techniques, ensuring your bookshelf is built to last.
- Personal Satisfaction: There’s a unique sense of accomplishment that comes with creating something functional and beautiful with your own hands. Every time you look at your finished bookshelf, you’ll feel a sense of pride.
- Skill Development: It’s an excellent opportunity to learn new woodworking skills or refine existing ones. You’ll gain experience with tools, measurements, and construction techniques that can be applied to future projects.
- Adding Value to Your Home: While a single bookshelf might not drastically increase your home’s market value, well-executed built-ins or custom shelving can be attractive features to potential buyers. It shows attention to detail and a personalized touch. If you’re considering selling, custom features like these can enhance your home’s appeal. You can learn more about preparing your home for sale and other real estate insights on the SimpleShowing blog.
Planning Your Bookshelf Project: Design and Materials
Before you even pick up a saw, thorough planning is crucial. This stage will save you time, money, and frustration down the line.
Designing Your Bookshelf: Dimensions and Style
Start by considering where your bookshelf will live and what it will hold.
- Location and Space: Measure the exact height, width, and depth available in your chosen spot. Account for baseboards, window sills, and any other architectural features. Do you want it to be a standalone unit, or will it be built into an alcove?
- What Will It Hold? This is vital for determining shelf depth and spacing.
- Books: Standard paperbacks are about 8-9 inches tall, while larger hardcovers can be 10-12 inches or more. Art books or coffee table books might require depths of 12-14 inches. Aim for a shelf depth that is slightly greater than your largest book, typically 10-12 inches for most general-purpose bookshelves.
- Decorations/Collectibles: If you plan to display items other than books, consider their sizes and how they’ll fit.
- Weight: Heavy books require stronger shelves and more support.
- Shelf Spacing: Adjustable shelves offer flexibility, but if you’re building fixed shelves, plan for varying heights. A good rule of thumb is to have some shelves spaced 10-12 inches apart for standard books, and perhaps one or two wider sections (14-16 inches) for larger items.
- Overall Style: Do you prefer a modern, minimalist look, a rustic farmhouse feel, or a classic, traditional design? This will influence your material choices, joinery methods, and finishing touches. Sketch out a few ideas, or look for inspiration online.
Choosing Your Materials: Wood, Plywood, and More
The material you choose will impact the look, durability, and cost of your bookshelf.
- Solid Wood:
- Pros: Beautiful, durable, can be stained or painted, and often gains character with age.
- Cons: More expensive, can be prone to warping or splitting if not properly dried and cared for, heavier.
- Common Choices: Pine (affordable, easy to work with), Poplar (good for painting), Oak (strong, durable, classic grain), Maple (hard, smooth, good for staining).
- Plywood:
- Pros: Stable (less prone to warping than solid wood), strong, available in large sheets, more affordable than solid wood.
- Cons: Edges need to be finished (edge banding or solid wood trim), can splinter if not cut carefully.
- Common Choices: Birch plywood (smooth, takes paint well), Oak plywood (good for staining, matches oak trim), ACX plywood (good for painting, but voids can be an issue). For bookshelves, aim for at least 3/4-inch thick plywood for shelves to prevent sagging.
- MDF (Medium-Density Fiberboard):
- Pros: Very stable, smooth surface, excellent for painting, affordable.
- Cons: Heavy, not as strong as plywood or solid wood (prone to sagging if not well supported), susceptible to water damage, creates fine dust when cut.
- Use Case: Best for cabinet boxes or components that will be painted and won’t bear extreme weight.
- Hardware:
- Fasteners: Screws (wood screws, pocket hole screws), nails (finish nails for trim), glue (wood glue is essential for strong joints).
- Shelf Pins/Supports: If you opt for adjustable shelves.
- Brackets: For wall mounting or additional support.
Pro Tip on Shelf Sag: For shelves longer than 30-36 inches, especially if they’ll hold heavy books, consider adding a solid wood face frame or a thicker front edge to prevent sagging over time. This is called “breadboarding” or adding a “nosings.”
Essential Tools and Materials List
Having the right tools will make your bookshelf building project much smoother and safer. Here’s a breakdown of what you’ll likely need:
Basic Hand Tools:
- Measuring Tape: For accurate measurements.
- Pencil: For marking cuts and drilling locations.
- Speed Square or Combination Square: For marking straight lines and checking angles.
- Clamps: Essential for holding pieces together while gluing or drilling.
- Utility Knife: For scoring wood or cutting tape.
- Wood Glue: For strong, durable joints.
- Safety Glasses: Always wear eye protection!
- Hearing Protection: For power tools.
- Dust Mask: Especially when cutting MDF or sanding.
Power Tools (Recommended for Efficiency and Accuracy):
- Circular Saw or Table Saw: For cutting large sheets of plywood or long boards. A table saw offers more precision.
- Miter Saw (Chop Saw): Great for precise crosscuts and angled cuts on boards.
- Drill/Driver: For pre-drilling pilot holes and driving screws.
- Orbital Sander: For smoothing surfaces and preparing for finish.
- Jig Saw: For cutting curves or intricate shapes (less common for basic bookshelves).
- Pocket Hole Jig (Optional but Recommended): A Kreg Jig or similar system makes strong, concealed joints, especially useful for plywood.
Materials (Based on your design):
- Wood or plywood for shelves, sides, top, and bottom.
- Backing material (thin plywood, hardboard, or beadboard – optional but recommended for stability and preventing items from falling behind).
- Wood screws (various lengths, appropriate for your material thickness).
- Wood glue.
- Sandpaper (various grits: 80, 120, 180, 220).
- Wood filler (if needed for imperfections).
- Edge banding (if using plywood and not trimming with solid wood).
- Finish of choice: Stain, paint, polyurethane, or clear coat.
- Shelf pins/supports (if making adjustable shelves).
- Wall anchors/straps (for securing tall bookshelves to a wall for safety).
Step-by-Step Guide: How to Build a Bookshelf
This guide will focus on a common and sturdy bookshelf design using plywood and pocket hole joinery, which is accessible for many DIYers. Remember to always follow safety precautions when using power tools.
Step 1: Cut Your Pieces to Size
Based on your design plans, carefully measure and cut all your components. Accuracy here is paramount. “Measure twice, cut once” is a golden rule in woodworking.
- Side Panels: Cut two pieces for the vertical sides of your bookshelf.
- Top and Bottom Panels: Cut two pieces for the horizontal top and bottom.
- Shelves: Cut the desired number of shelves. Ensure they are all the same length.
- Back Panel (Optional): Cut a thin piece of plywood or hardboard to fit the overall dimensions of your bookshelf’s back.
- Face Frame (Optional): If you’re adding a face frame for aesthetics or extra strength, cut these pieces now.
Cutting Tips:
- Use a straight edge or guide rail with your circular saw for perfectly straight cuts on large sheets of plywood.
- Support your material well to prevent tear-out, especially with plywood.
- Label each piece as you cut it (e.g., “Left Side,” “Top,” “Shelf 1”) to avoid confusion.
Step 2: Prepare for Assembly – Drilling Pocket Holes
If you’re using pocket hole joinery, this is where your pocket hole jig comes in handy. Pocket holes create strong, hidden joints.
- Set your pocket hole jig to the correct depth for your material thickness (e.g., 3/4 inch).
- Drill pocket holes on the ends of your top, bottom, and shelf pieces. These holes will face inward and be hidden once assembled.
- For the top and bottom, drill holes along the edges that will connect to the side panels.
- For the shelves, drill holes along both ends that will connect to the side panels.
- If you’re not using pocket holes, you’ll likely be using screws driven directly through the side panels into the ends of the shelves, or dado/rabbet joints (more advanced). If driving screws directly, you’ll need to pre-drill pilot holes to prevent splitting.
Step 3: Assemble the Main Carcass
This is where your bookshelf starts to take shape.
- Attach Top and Bottom:
- Apply a bead of wood glue along the edges of the top and bottom panels where they will meet the side panels.
- Clamp one side panel vertically. Position the bottom panel flush with the bottom edge of the side panel (or slightly recessed if you prefer a toe kick).
- Drive pocket hole screws (or regular wood screws) through the pre-drilled holes to secure the bottom panel to the side.
- Repeat for the top panel, ensuring it’s flush with the top edge.
- Attach the second side panel in the same manner, creating a basic box.
- Use a square to ensure all corners are at 90 degrees as you assemble. Clamps are your best friend here to hold everything in place while you fasten.
- Install Shelves:
- Measure and mark the exact locations for your shelves on the inside of both side panels. Use a level to ensure your lines are perfectly horizontal.
- Apply wood glue to the ends of a shelf.
- Position the shelf between the side panels, aligning it with your marks.
- Drive pocket hole screws (or regular wood screws) through the pre-drilled holes to secure the shelf to the side panels.
- Repeat for all remaining shelves.
- Adjustable Shelves (Alternative): If you opted for adjustable shelves, you would drill a series of evenly spaced holes along the inside edges of the side panels using a shelf pin jig. Then, simply insert shelf pins into the desired holes and rest your shelves on top.
Step 4: Add the Back Panel (Optional but Recommended)
Adding a back panel significantly increases the rigidity and stability of your bookshelf, preventing it from racking (leaning side-to-side).
- Lay the assembled bookshelf face down on a clean, flat surface.
- Position the back panel squarely on the back of the bookshelf.
- Secure the back panel using small finish nails or screws, spaced every 6-8 inches around the perimeter and into the back edge of each shelf.
- Ensure the back panel is flush with the edges or slightly recessed, depending on your preference.
Step 5: Finishing Touches – Sanding and Finishing
This step transforms your raw wood into a beautiful piece of furniture.
- Sanding:
- Start with a coarser grit sandpaper (e.g., 80 or 120) to remove any major imperfections, glue squeeze-out, or rough spots.
- Progress to finer grits (e.g., 180, then 220) for a smooth finish. Sand with the grain of the wood.
- Pay special attention to edges and corners, rounding them slightly for a softer feel.
- Thoroughly wipe down the entire bookshelf with a tack cloth or a damp cloth to remove all dust before applying any finish.
- Finishing:
- Stain: Apply wood stain according to the manufacturer’s instructions. Wipe off excess. This enhances the wood’s natural grain.
- Paint: Apply a primer coat first, then two or more thin coats of your chosen paint, sanding lightly between coats for a smooth finish.
- Protective Topcoat: Once the stain or paint is dry, apply a protective topcoat like polyurethane, lacquer, or shellac. This protects the wood from wear and moisture. Apply multiple thin coats, sanding lightly with very fine grit sandpaper (e.g., 320 or 400) between coats for the smoothest, most durable finish.
Step 6: Secure to the Wall (Safety First!)
Especially for tall or narrow bookshelves, securing them to the wall is crucial to prevent tipping, which can be a serious safety hazard, particularly in homes with children or pets.
- Locate wall studs using a stud finder.
- Use anti-tip brackets or L-brackets to attach the top of the bookshelf securely to the wall studs.
- If studs aren’t available, use appropriate wall anchors (toggle bolts for drywall, masonry anchors for brick/concrete).
Maintenance and Care for Your New Bookshelf
Once your bookshelf is built and filled, a little ongoing care will keep it looking great for years.
- Dust Regularly: Use a soft, dry cloth or a duster to prevent dust buildup.
- Clean Spills Immediately: Wipe up any liquid spills promptly to prevent staining or water damage, especially on unfinished or lightly sealed wood.
- Avoid Direct Sunlight: Prolonged exposure to direct sunlight can fade wood finishes and even warp wood over time.
- Distribute Weight Evenly: Try to distribute the weight of your books and items evenly across the shelves to prevent bowing or sagging. Place heavier items closer to the sides or on lower shelves.
- Check Fasteners: Periodically check screws and joints to ensure they are still tight, especially if the bookshelf is moved or heavily loaded.
Common Bookshelf Building Mistakes to Avoid
Even experienced DIYers can make mistakes. Here are some common pitfalls to watch out for when you build a bookshelf:
- Inaccurate Measurements: This is the root of many problems. Double-check every measurement before cutting.
- Not Using Wood Glue: Screws alone are not enough for strong, durable joints. Wood glue is essential for creating a bond that’s often stronger than the wood itself.
- Skipping Pilot Holes: Driving screws directly into wood without pilot holes can cause the wood to split, especially near edges or on harder woods.
- Insufficient Clamping: Clamps hold pieces tightly together while glue dries and screws are driven, ensuring tight joints and preventing gaps.
- Over-tightening Screws: This can strip the screw hole or crack the wood. Tighten until snug, then stop.
- Not Sanding Properly: A poor sanding job will show through any finish, making the piece look unprofessional.
- Rushing the Finish: Allowing proper drying time between coats of stain, paint, and topcoat is crucial for a smooth, durable finish.
- Ignoring Safety: Always wear safety glasses, hearing protection, and a dust mask when using power tools. Be aware of your surroundings and keep your workspace clean.
- Forgetting to Anchor: A tall, freestanding bookshelf can be a tipping hazard. Always secure it to a wall.
Final Thoughts on How to Build a Bookshelf
Building your own bookshelf is more than just a home improvement project; it’s an opportunity to create a custom piece that reflects your style and meets your specific needs. From the initial design and material selection to the final sanding and finishing, each step offers a chance to learn and refine your skills. The satisfaction of seeing your vision come to life, and then filling it with your favorite books and treasures, is truly unparalleled.
With careful planning, the right tools, and a little patience, you can successfully build a bookshelf that is not only functional but also a beautiful addition to your home. So gather your materials, put on your safety glasses, and enjoy the rewarding process of crafting something unique and enduring for your space.