Upgrade Your Home’s Value with These Hacks!

Buying a home is one of the biggest decisions in a person’s life and this can have numerous effects on you. It might be emotional, mental, and also in financial as you invest in your house.

While owning a house, it’s a wise idea to complete small projects aimed at increasing the value of your home over the years. As your equity of the house grows, you’ll be glad that you invested in small upgrades along the way.

If you’re plan on selling your house soon or you just want to increase the value over time, follow these hacks to upgrade your home’s value.

Be energy efficient in your home

Having energy-efficient homes can drastically increase the value of your own home. With an energy-efficient home, you can easily save and lower electric bills in your home, you can do this by installing a smart thermostat and investing in home tech.

This then will help appeal to buyers to buy the house or if not for sale, will easily increase the value. Who doesn’t want a house that can save energy and money?

Maximize your curb appeal

What’s the first thing home buyers or people see at a house? It’s the front of the home. Making your front elevation beautiful and clean can easily appeal to the buyers or people of your house, which then will increasingly add value to your house by up to almost 7%.

You can enhance your curb appeal by cleaning your driveway with a power wash, adding greenery to your lawn, mowing your lawn, or even washing the windows. All of the ways to enhance your curb appeal can help make your home look nice and increase its value of it.

Brighten up the place with fresh paint

The most evident and big change you can do to improve the value of your house is by painting your house – including interior walls, exterior trim, door casing and trim. This is a popular approach because a new color of your house can easily make it brand new.

It can even also fix a worn or old-looking wall and ceiling just by adding fresh paint to it.  This also helps in experimenting with a different kind of look for your house.

You could try a combination of bold colors or a simple aesthetic one that can make your home look homey. Nonetheless, a fresh paint to your home increases its value drastically and it is not an expensive change

Upgrade plumbing fixtures

One type of upgrade that gives the most bang for your buck is a cosmetic kitchen or bath rehab. For the kitchen this could include replacing the kitchen faucet or adding a garbage disposal.

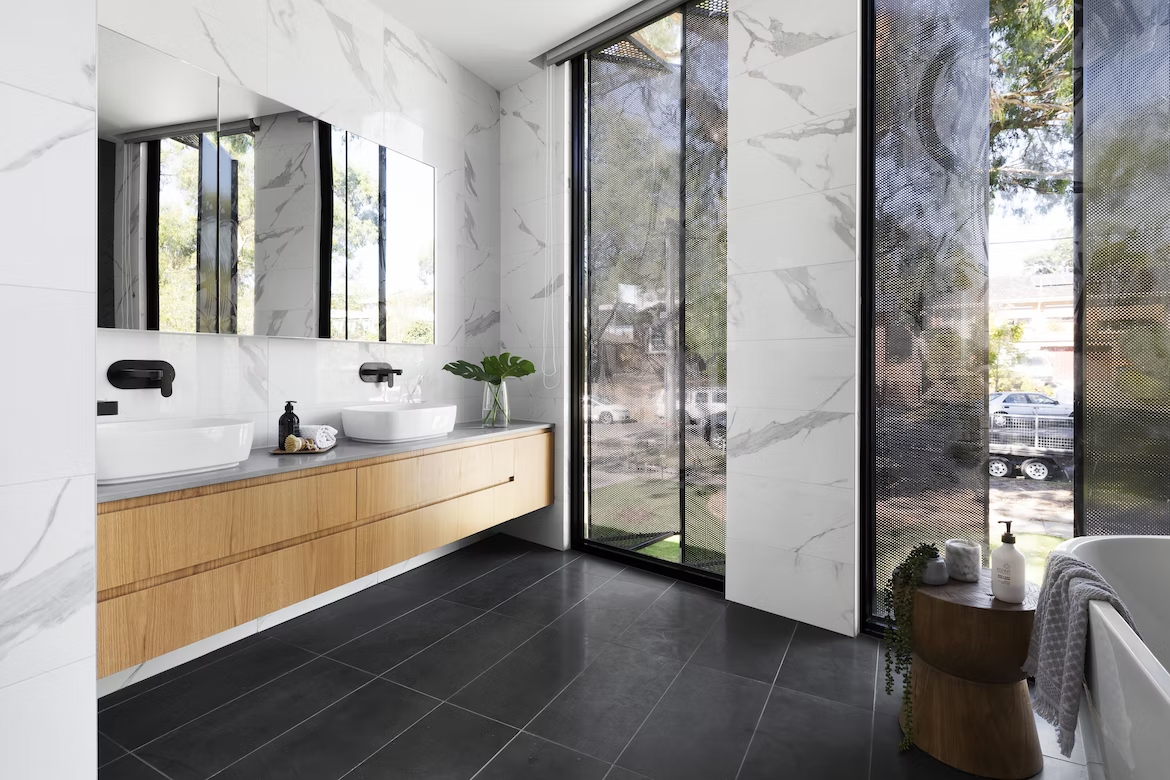
Baths are typically easier to upgrade as well. You could quickly replace a vanity, toilet or sink or shower faucet is less than one day. Try a gold patina finish or modern black finish to give your bathroom a pop of color!

Clean and declutter living areas and closets

If you a looking for a quick way to increase the value of your home, then start by cleaning and decluttering your own home. The ways you could do this is to start cleaning out your closet, make a garage sale, or donate your clothes, items or furniture, or anything that you will not need.

Try to sweep and mop your home as well, sweep the ceiling, under the furniture, or in any nook and crannies, then mop the floors.  You could also hire some professional for some stubborn stains or yourself. Overall, simple cleaning and decluttering will make your home look good and it will also add value to your home!

Repurpose your basement or other unfinished spaces

Making room for an additional living square foot will improve the value of your home by a lot. Every square foot you can offer will make your home more appealing and also has an advantage compared to others.

You can start this by makeover some of the rooms that you do not use like some big closets, attics, or storage rooms in your home. If you do not want an expensive project, you can simply clean the room, put in a drywall, or a simple carpet to make it look like an additional room to live in!

Final thoughts

The steps listed are a great tip to start adding value to your home for selling or just building value to your home. You can start small projects like painting, cleaning, and decluttering up to big projects like making a room. Overall, you can start adding value to your own home now with the hacks listed!

Make Your Apartment Appear Larger with These Tricks!

Apartments for rent are usually small in space. But it can still be as cozy and stylish as we want our home to be. Here are a few tips and tricks to maximize the space in your flat and make your apartment appear larger without making the whole place feel overcrowded.

Minimize Clutter

Clutters can become a visual distraction and can take up space in your place. So, the first step in making your apartment appear larger is to clear out unnecessary clutters in sight. Doing so, can create more available space in your apartment and remove any distractions. Minimizing clutter does not mean throwing out half of your valued items in the trash, instead, what you can do is find creative ways to store and organize them out of sight which leads us to our second tip.

Be Creative with Storage and Multipurpose Furniture

One of the most effective ways to maximize the space in your apartment is to get creative with your storage and this includes using multipurpose furniture. When living in an apartment, you honestly don’t get as much space as you need for extra furniture. So, instead of buying multiple storage boxes that don’t look appealing, why not buy a piece of furniture like a bed with built-in drawers, a sofa bed, folding tables, expandable dining tables- anything that does not take up much space but provides multiple purposes for your needs?

Strategically Place your Furniture

In order for you to effectively use the multipurpose furniture that you invested in, make sure that you also place them strategically pleasing to the eyes. Do not block pathways and view into a room to open up space and make it seem larger as well as to avoid feeling cramped. Additionally, using furniture closer to the ground creates a more sense of openness thus making the room appear larger.

Make Use of Contrast and Light Colors

To make your apartment looks roomier than it is, considers changing your wall paint and furniture’s color. Light and dark colors contrast each other thus giving a room more depth and look bigger by just changing the color scheme of the room. To do this, paint your wall with light colors to make the room brighter and add contrast by using dark-colored furniture strategically.

Take Advantage of Natural Lights

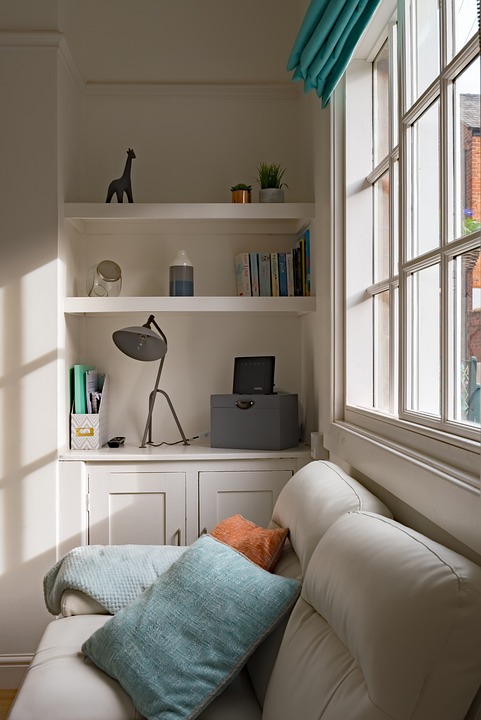
The easiest way to make a small apartment for rent appear larger is to make use of natural lights as much as possible. Open up the windows, get rid of heavy curtains, and let the light in lightening the space in your apartment. If your apartment doesn’t have a large window to work on, you can also use artificial lights creatively for additional light flow.

Curtains or No Curtains?

Apartments for rent doesn’t usually come with high ceiling and wide space as we need but the trick to make it appear taller is to add floor-to-ceiling curtains in your windows. Lightweight floor-to-ceiling curtains can instantly boost the height of any room however, in some cases, adding curtains can add up additional space in your home. So, before adding a curtain to your apartment, make sure it is lightweight and simple looking.

Mirrors

Using mirrors is also an effective way to make your apartment look bigger and more open. Mirrors, placed at a proper angle, can give the illusion of depth and also reflect lights that can help to make the room brighter. You can hang mirrors on the wall to imitate a window, use glass table tops for a more open feel, or invest in mirrored cabinet doors- add any reflective surfaces and be creative with them.

Keep it Simple

On top of every listed above, keep everything simple. In order for your apartment to appear wider you want to keep everything minimal. From your stuff and furniture up to your color scheme – everything must be simple yet appealing. The more things you keep in your apartment, the more it will look cluttered and feel more crowded.

Conclusion

In conclusion, affordable apartments are undeniably small in size however, that doesn’t mean they can’t be our home. It may lack some space but there are still things that we can do to keep our apartment comfortable, cozy, and pleasing to the eyes. And one of these things is making our apartment appear more spacious through the tips and tricks mentioned above.

A Helpful Guide For Finding The Perfect Window Treatment

Window treatments can add a touch of luxury and comfort to any home. They can also help improve energy efficiency and privacy. But with so many different types of window treatments available, it can be challenging to know which is the right one for you. This blog post will provide tips for finding the perfect window treatment for your home.

Know the different types of window treatments

First, it’s essential to familiarize yourself with the available types of window treatments in the market. This way, you will know which type might be right for your home. The most common window treatments include curtains, blinds, shutters, and shades. Curtains in various colors, patterns, and materials are a classic choice for window treatments. They can be hung from a rod mounted above a window, or they can be hung from a track that is installed on the ceiling.

Blinds, which are made from wood, aluminum, or vinyl, are another popular type of window treatment. They can be opened and closed with a cord or a wand. Shutters are a type of window treatment usually made from wood or vinyl. They can be opened and closed with either louvers or panels. The reputable window treatment providers behind Shuttercraft recommend that you opt for custom-made shutters to get a perfect fit for your windows.

Shades are window covers made from fabric, paper, or metal. They can be raised and lowered with a cord or a chain. There are several different shades, including roller shades, Roman shades, and solar shades. It might also be wise to invest in modern electric security shutters to provide your home with some additional security.

Choose the right material

Once you know the different types of window treatments available, you can start narrowing down your choices by considering the materials. The material you choose should be based on your personal preferences and the needs of your home. For example, choose a material resistant to mold and mildew in a humid climate. For those with young children or pets, choose a material that is durable and easy to clean. Usually, materials which are easy to clean will be more expensive, but your investment will be worth it.

Factor in the style of your home’s décor

When selecting window treatments, it’s crucial to choose a style that compliments the overall décor of your home. For example, if you have a traditional style home, you might want to choose window treatments that have a classic look. If you have a more contemporary style home, you might want to choose window treatments with a modern look. Some of the window treatment styles that are available include traditional, transitional, contemporary, and rustic. Conventional window treatments tend to be more formal. Transitional window treatments are a mix of both traditional and modern styles. Contemporary window treatments tend to be more casual. Rustic window treatments have a more country or cabin-like feel to them.

Consider your budget

When choosing window treatments, it’s essential to consider your budget. Window treatments can range in price from a few dollars to several hundred dollars. Finding a window treatment that fits your budget while still providing the style and function you desire is crucial. Generally, more expensive window treatments will be made from higher-quality materials and last longer. However, some lower-priced window treatments are still made from high-quality materials. Doing your research before purchasing is vital to ensure you are getting your money’s best value.

You might want to choose window treatments that are designed to be energy efficient in case you’re looking for ways to reduce your energy bill costs. Some window treatments, such as shades and blinds, can help to keep your home cooler or warmer depending on the season. This is because shades and blinds can block out the sun’s rays in the summer, which will help to keep your home cooler. In the winter, they can trap heat inside your home, which will help to keep it warmer. This can help you reduce energy usage and save money on utility bills.

If you’re having trouble choosing the right window treatments for your home, don’t hesitate to ask for help. Many professional window treatment providers would be more than happy to assist you. They can advise and help you select the perfect window treatments for your home. More often than not, they will be able to provide you with the perfect solution.

These are just a few things to remember when choosing window treatments for your home. Following these tips, you can find the perfect window treatment and even add value to your home. Rest assured that with some patience and research, you’ll find the perfect window treatment in no time.

6 Easy Roof Maintenance Tips to Make It Last

It’s understandable how hard it is to take time while working at home or attending to an office job to maintain the literal roof over your head. However, you’ve got to do it or else it’s even more expensive to fix with a contractor and whatnot.

So how should you make sure that your roof is always in good shape even though it’s usually mostly out of sight and out of mind? Follow the tips below to find out!

1. Trim the Branches of Nearby Trees ASAP

If you don’t want to regularly clean your roof with a rake, broom, or leaf blower in order to get rid of wayward leaves, make sure the branches of nearby trees are trimmed. Hire someone to trim them for you or do it yourself with a handsaw or chainsaw.

This preventative maintenance tip will also keep you from needing assistance from a local roof replacement contractor to replace a degraded roof. Yes, even leaves and overflowing ducts can do a number on the support beams of your tiled or tin roof, for your information.

2. Clean Your Roof of Trash and Debris Regularly

Even after trimming the branches of nearby trees, you’ll still need to get rid of leaves from the trees blown by far-off trees from the neighborhood, among other airborne garbage that flies or floats around. You should specifically watch out for cat or rat feces and urine.

The waste products of strays and pests will force you to get a roof replacement contractor on speed dial or as a regular smartphone contact if you let them accumulate. They can degrade and compromise your roof to the point of outright structural damage, whether it’s made of stone or metal.

3. Proper Ventilation Will Do Wonders for Your Roof

Did you know that properly ventilating your roof can make all the difference when it comes to its longevity? It’s true. Your roof needs space or holes for it to breathe. Or else it will build pressure. Trapped moisture and heat can degrade its mortar, metal, and plaster foundations from within.

Like water trapped on the roof of your car, the heat and moisture can also wreak havoc over your tiled or metal tin roof. Fix all this by installing quality insulation that helps your roof function against the elements better. Also give it a nice fresh paint job whenever it needs one.

4. Check the Integrity of Your Gutters as well

Gutters play a crucial role when it comes to keeping your roof and home protected and safe. It drains the water from rainfall or melting snow to a safe place, which is your drainage system, diverting all that water and debris away from your roof and helping clean it at the same time.

Roof maintenance naturally means gutter maintenance as well. Your contractor or you yourself can regularly check the gutters to ensure they’re in tiptop shape so that they won’t end up clogging later on and costing you even more money to fix down the line.

5. Regularly Treat the Roof for Algae and Moss

It’s detrimental to let algae and moss grow on your roof. You see it on ancient ruins all the time. They can crumble in an instant in the event of an earthquake but they can also crumble over time with the presence of these plants on the surface of clay tile or tin roofs. They’re also quite unsightly to boot.

You can buy algae and moss sprays or chemical cleaners that work wonders in removing them. You can also hire a power washer to wash your roof or patio for you, since high-pressure water can do wonders in removing these sticky pernicious plants off of your roof.

6. Inspect the Roof and Attic After Every Storm

While it’s tempting to rest easy after a storm since going through a storm is stressful enough, it cannot be stressed enough that you need to inspect your attic and your roof after the storm has passed. You need to take into account any damage done.

Have any water damage fixed and dealt with early on instead of waiting for the next storm to cave your roof in or flood your attic up, leading to a much bigger and more expensive mess when all is said and done!

Final Things to Consider

Roof maintenance is easier than you think. You can have someone look at it with your ladder or their own ladder to do minor things like clean up the falling leaves and garbage in the gutter or sweep up the tiles of dirt. They can also be responsible for weatherproofing or fixing the roof.

3 Reasons Why You May Need A Real Estate Agent

You’ve decided you want to buy a house. Or, maybe you’ve decided you want to sell your house. But, do you really need a real estate agent? In this blog post, we will explore three reasons why you may need a real estate agent when either buying or selling a house. From their expertise to their negotiation skills, read on to learn more about how real estate agents can help you in the home-buying or -selling process.

You’re Not Familiar With The Area

If you’re not familiar with the area, a real estate agent can be a valuable resource. They can provide you with information about the local market, schools, and other important factors that can impact your decision. If you’re relocating to the Southeastern US, the team at SimpleShowing are experts in the local markets of Georgia, Florida and Texas. If you’re moving to Arizona, Dezert Properties in Bullhead City are local experts whether you’re buying or selling residential property or have your sights set on vacant land.

In short, a local expert can also help you find the right neighborhood for your needs. They’ll be familiar with the micro trends that impact home value and will have a pulse on things like crime level, school ratings as well as local building and zoning ordinances.

You’re Not Experienced With The Process

If you’re not experienced with the process of buying or selling a home, working with a real estate agent is a must. A good agent will walk you through every step of the process and help you avoid any pitfalls. They’ll also be able to provide you with valuable resources and advice, so you can make the best decision possible.

Experienced agents are very familiar with the language and terms of the purchase contract because they’ve used in many, many times. A good agent can not only help you with the contract, but also with things like mortgage pre-approval, home tours and lining up your inspection once you’re under contract. If you’re selling, you’ll need an agent to get your home listed on the local MLS (multiple listing service) in order to get maximum exposure for your property.

You Want Someone To Negotiate For You

If you’re looking to buy or sell a property, you may be wondering if you need a real estate agent. After all, can’t you just go through the process yourself? While it’s true that you can buy or sell a property without an agent, there are many reasons why you may want someone to negotiate for you.

For one, real estate agents have a lot of experience in negotiating deals. They know how to haggle and how to get the best price possible. They also know the ins and outs of the market and can help you navigate through the process.

Another reason to use an agent is that they can save you a lot of time. If you’re trying to buy or sell a property on your own, you’ll likely have to do a lot of research and legwork. An experienced agent can handle all of that for you and make sure that everything goes smoothly.

Finally, having an agent on your side can give you peace of mind. Knowing that someone is taking care of everything and looking out for your best interests can make the entire process less stressful.

There you have it! Three reasons why working with a real estate agent may be a good idea for you. If you’re looking to buy or sell a home, an experienced agent can guide you through the process and help you avoid any potential pitfalls. So if you’re ready to take the next step in your real estate journey, be sure to find a reputable agent in your area.

4 Things To Know About VA Home Loans

Having a roof above one’s head is a basic need. However, millions worldwide don’t have homes to provide protection and comfort.

In 2020, around 22,048 United States veterans were in homeless shelters due to substance abuse, mental health problems, and an overall lack of affordable housing. Fortunately, private and government organizations help homeless people get back on their feet.

For instance, the US Department of Veterans Affairs (VA) runs and guarantees home loan programs for qualified borrowers to make home ownership easier. Aspiring homeowners must inquire through the nearest VA office or third-party lenders. Meanwhile, they may also gather essential information on VA home loans, as below.

  1. VA home loans aren’t for everyone

Like the rest of private and government-backed financing programs, the VA home loan is restricted to individuals who served or continue to serve in different capacities. In a nutshell, it’s for:

  • Veterans
  • Active military members
  • Discharged and active members of the Reserve forces and National Guards
  • Surviving spouses of military members who died or were disabled during active duty

VA loan eligibility depends on a member’s scope and date of active service. For instance, current members’ minimum operational duty requirement is 90 days without a break. For veterans, it varies on the date of service. National Guards and Reserve force members may also be eligible depending on when they served.

For example, those active from September 1980 to August 1990 must have gone on uninterrupted duty for at least two years or at least 181 days for those discharged due to hardship or changes in the structure.

In some cases, veterans and active members who did not meet the minimum service requirements may still get their certificate of eligibility (COE) after being discharged for hardship, certain medical illnesses, disability, or any changes.

  1. There are various VA home loans available

When purchasing a home, it’s essential to know the VA home loans available. Here’s a quick guide:

  1. Native American Direct Loan (NADL): The Native American Direct Loan is available for Native American active members or veterans who want to engage in any housing-related activity within the federal trust lands or Reservation areas. There are about 547 federally recognized tribes in the country.
  2. VA-backed purchase loan: Aspiring homeowners who are either veterans or on active duty can use a VA home loan to purchase their family home. It works similarly to other home mortgage programs but often doesn’t require a down payment and hefty monthly interest rates on top of the amortization costs. Hence, this is perfect for first-time homebuyers.
  3. Interest Rate Reduction Refinance Loan (IRRRL): This VA home loan is a simple solution for existing borrowers who want to lower their interest rates and monthly payments further. Besides reducing monthly costs, submitting an application is easy, even through a private lender, as this is another VA-backed loan program. Ensure that as a borrower, you’ve never paid past due dates to increase your chances of approval.

VA cash-out refinance loan: If you have plenty of financial obligations, borrowing from your home equity may be a solution to consolidate your debts, refinance your current VA home loan or pay for other expenses.

This program typically replaces your mortgage with a larger sum to get the cash difference between them. Unlike an IRRRL, a borrower will likely pay higher interest and monthly rates for this loan type.

VA loans may be accessed directly from VA or other lenders. However, of the loan types below, the agency runs only the program for Native Americans. The rest are from third-party lenders catering to first-time home buyers or existing borrowers.

  1. VA home loan offers the best option for low-income earners

Besides less stringent requirements and waived down payment, borrowers can enjoy the lowest interest rates from their VA-back home loans.

The latest information shows that a 30-year fixed rate interest for a VA home loan purchase is 6.5%, with an annual (APR) rate of 6.63%. The general rate for non-VA lenders is 7.16% and 7.18%, whereas the figures from the Federal Housing Authority (FHA) loan show a 6.42% interest rate and 7.28% APR.

When looking at long-term loans, it’s also crucial to look at the annual percentage rate, as it shows the yearly total cost of the loan, including fees.

  1. Borrowers must pay VA funding fees

Borrowers will be asked specific VA funding fees, depending on how much down payment was made or if it’s the borrower’s first or second VA loan. For example, according to the Military Benefit Association, first-time borrowers who put in from zero up to 4.9% of the total loan cost must pay 2.3% funding charges, whereas frequent borrowers who place the same equity are charged 3.6% of the entire VA loan amount.

However, all VA loan applicants pay the same rates of 1.65% and 1.4% funding charges for down payments of five to 9.9% and more than 10% of the total loan package, respectively.

VA funding fees are used to manage the home loan costs, so taxpayers don’t bear the brunt of this low-cost loan program. Over 256,000 VA home loans amounting to more than USD$83 billion were processed in the first quarter of this year.

Conclusion

VA home loans are offered to veterans, active soldiers, or their surviving spouses. Besides low-interest rates and APR, borrowers can sometimes waive their down payment and reduce interest further through refinancing schemes.

With these benefits, more military members will hopefully avail, helping address homelessness among US veterans and members.  

What’s Included in a Home Inspection?

A home inspection is an important part of the home buying process and a successful home inspection can save you headaches and costs down the road. This article will help understand what all is included in a home inspection to ensure your inspection company captures all of the critical home categories and systems in their inspection report.

What’s included in a home inspection?

When a home inspector inspects a home, they typically fill out an inspection report that covers the condition of key component of the home. Below is a detailed checklist of features that inspectors should review and document as part of their service:

  • Major Appliances: Refrigerator, stove/range, microwave and dishwasher.
  • Interior: Cabinetry, countertops, stairways, floors, doors, windows.
  • Insulation/Ventilation: Vapor retarders, attic crawl space insulation, and venting fans.
  • Heating & Air Conditioning: Entire A/C system will be checked to see if it is working appropriately.
  • Electrical: All electrical components are inspected to see that they are fit and operating safely. This includes checking the service panel, electrical wiring, grounding equipment, and conductors.
  • Plumbing: Piping, including waste, vents and drains systems.
  • Roofing: Tightness of flashing, loose tiles or shingles, estimated age of the roof.
  • Structural components: Foundation of the home, slab, and support structures including decks.

How much does a home inspection cost?

A typical home inspection for a single family home that is 2,400 square feet will cost between $350 and $500. The current national average is $394. However, this number can vary depending on a wide range of factors, including market and what is included in your inspection.

If the home includes additional inspection services such as septic system inspection, radon testing, air quality test or termite inspection, the cost could go up substantially.

Generally termite inspections are usually conducted separately from a “general” home inspection and require a different license. These inspectors can check for insects such as ants and termites and other pests. This inspection will take around an hour and come with an additional fee — though some inspectors do carry the additional licensure. The average cost of a termite inspection is about $150.

How do you find a licensed, home inspector?

If you are working with a real estate agent, they’ll likely make recommendations for a reputable home inspector. If you are working independently, you can check websites like Google, Angi, Thumbtack and HomeAdvisor to find licensed home inspectors near you. Read reviews before you hire an inspector to ensure you’ve selected a trustworthy individual.

When should you schedule a home inspection?

Home inspections are typically scheduled after an offer is accepted on a home, during the inspection period or “due diligence” period. By waiting until acceptance, you avoid paying additional expenses if another offer is chosen over yours.

How long does an inspection take and who pays for it?

Because the inspector is attempting to discover concealed or previously unknown flaws with the property, a typical home inspection can take about 2.5 – 3 hours to complete, but could last longer for larger properties.

The home inspection fee is almost always paid by the homebuyer, except in rare cases where the homebuyer negotiates the fee to be reimbursed to the buyer at closing.

What happens after an inspection?

Generally, as the buyer, you have a few options on how to proceed:

  1. You can proceed as normal.
  2. You can ask the seller to make repairs.
  3. You can renegotiate the sale price or ask the seller for a credit towards the repairs (which you complete afterward closing).
  4. You can cancel the contract if there is extensive damage or repairs you’re not willing to have fixed.

What happens next depends on the language/terms of your purchase contract, the strength of your offer and the extent of repairs needed. Inspectors always find issues with homes, so don’t worry if there’s a list of minor things the house needs. These could add up to a few hundred dollars or a few hours of handy work one weekend. If the repairs are minor and there was significant competition for the home, or if you feel you’ve already gotten a fair deal on the purchase price, you may choose not to worry about it.

It’s also important to remember that the Seller generally isn’t under an obligation to repair anything, so the Buyer can typically cancel the contract if the Buyer and Seller can’t come to terms regarding the repairs (Though again, it depends on the terms of the contract).

How long is an inspection period?

Duration of the inspection period is determined by state rules and demand of the home. In an ideal inspection period of 10-14 days would be typical for every buyer. However, most Sellers want to get things wrapped up as soon as they can. If you’re in a competitive situation, then you may need to narrow down the inspection period. This period is limited, so always keep that in mind when deciding what you’d like to do. Consult with your agent and contract for more details.

Closing Costs for Home Buyer in Georgia

The first thing most homebuyers think about is saving for the down payment on their new home – which is typically 3 – 5% of the purchase price, but could be 0% for FHA-eligible buyers. But in addition to the down payment, prospective homebuyers often neglect to consider the closing costs associated with buying a property.

Closing costs represent a significant amount of money – sometimes as much as the actual down payment. In Georgia, you can expect closing costs to be a little more manageable than in other states. Here’s everything you need to know.

What are Closing Costs?

Closing costs are the fees paid by the buyer and the seller when a home is sold. These fees typically need to be paid upfront – in other words, they can’t easily be rolled into your loan balance the way your down payment can.

It’s very difficult to determine your exact closing costs until you have a home in mind because many of the fees are dependent on the specific home.

Who pays for Closing Costs in Georgia?

While both the buyer and the seller pay for closing costs in Georgia – they are each responsible for different costs. If you’re a buyer, scroll down to see the 5 categories of closing costs that you’ll be responsible for paying at closing. If you’re a seller, you’re mostly responsible for the agents’ commission and prorated property taxes for the time you occupied the house during the year in which you’re selling.

How Much are Closing Costs in Georgia?

If you’re interested in getting a rough estimate of your future closing costs, in Georgia home buyers spend an average of 2.0 – 2.5% of the purchase price. The median home price in Georgia is $312,000.  Given 2.0% in closing costs, you could owe about $6,240 in closing costs. Here are the line items that account for buyer paid closing costs:

1. Lender Fees

Depending on your lender, they’ll either charge you one origination fee for your mortgage or list them out in individual amounts like:

  • Mortgage Processing Fees
  • Appraisal Fee
  • Courier Fees
  • Credit Check Cost
  • Flood Certification
  • Lender Title Policy

In some cases, it may also make sense to request discount points from your lender, which would lower your interest rate but would also need to be paid as a closing cost.

2. Title Fees

Before you take over title of a house, you want to be sure that no one will be able to challenge your ownership later on. Imagine if the former owner had a lien and a lender was able to prove that the house was actually theirs because of it. You could be in for a lengthy and very expensive court case in order to keep the house.

This is why you want to pay for title insurance during closing. The insurance company will do rigorous research to ensure your claim to the house will never be successfully challenged once you close. If you’re taking out a loan, you’ll also be required to buy the lender a title insurance policy for similar reasons. They, too, want peace of mind knowing that their borrower will never be stripped of their collateral.

Title fees will probably represent a large amount of your total closing costs as the buyer, so be sure to shop around. And remember that the “owner’s title policy” is an optional insurance policy that you do not have to purchase.

3. Third-Party Fees

Any number of third parties may be involved in the purchase of a home, each of which will charge a fee for their services. Some examples of these fees include:

  • Credit Report Fee
  • Mortgage Insurance Premium (if your down payment is less than 20%)
  • County Transfer Taxes (for recording the deed)

4. Homeowner Association Fees

Becoming a homeowner in a neighborhood that is governed by an HOA comes with financial obligations. While these fees are usually assessed annually, they are often charged monthly or quarterly with a portion of the money then collected upfront at the time of closing.

5. Escrowed Property Taxes and Homeowners Insurance

Homeowners insurance is typically collected at the time of closing for at least the remainder of the year in which you close. Other insurance companies require an entire first year premium to be collected at the time of closing.

Property taxes are typically escrowed, which means they are paid monthly as part of your mortgage payment. The closing attorney or title company will require that the balance of the prorated current year property taxes be paid at the time of closing.

How to reduce your closing costs

As a buyer, you can actually negotiate seller paid “contributions” towards your closing costs. Naturally, this is something the seller often will not want to do – so, you’ll have to consider market conditions, days on market, asking price and other factors when attempting to request that the seller contribute towards your closing costs.

If the market favors you, as the buyer, the seller may be open to covering some of the earlier mentioned fees as a way to make the purchase more attractive. Conversely, in a multiple offer scenario, the seller is unlikely to entertain paying for your closing costs.

You can also offer over asking price and bake in closing costs in order to reduce your need to come up with the cash at closing. For example, if the asking price is $400,000 you could offer $405,000 with $5,000 cash paid towards your closing costs. Generally the seller will treat this the same as a $400,000 offer with $0 in paid closing costs.

How can I estimate my closing costs?

The best way to get a more accurate closing cost estimate is to meet with your Realtor and/or mortgage advisor. They can help you come up with these numbers based on the purchase price range you’re shopping in. For a rough estimate, 2.0% is a good number to use:

  • For a $350,000 home, you’d pay approximately $7,000 in closing costs in Georgia
  • For a $600,000 home, you’d pay approximately $12,000 in closing costs in Georgia

The Easiest Way to Put $5k Toward Your Closing Costs

At SimpleShowing, we’re also very proud to offer help with closing costs to buyers who use our program to connect with a real estate agent and find their perfect home.

Upon closing, home buyers who purchase any home with a SimpleShowing agent can get $5,000 on average towards closing cost with our Buyer Refund Program!

Do You Need a Realtor to Buy a Home?

Buying a home is a major life decision. But that doesn’t mean you can’t do it on your own with a little bit of research and planning. The process of homebuying does not require hiring a Realtor, although, in many situations it might make sense to do so. This article, written by a licensed broker, explains the pros and cons of buying a home without a real estate agent and also provides some tips for solo home buying.

Benefits of buying on your own, without an agent

Purchasing a home on your own is definitely doable. The main advantages include commissions savings on the purchase, control of the timeline and transparency into the process. We’ll explore these factors below.

Commission savings

The major downside of hiring an agent is the cost. Yes, that’s right, the cost! Many consumers believe that it is “free” to hire a Realtor – however, that is not true. In fact, in 2020, the US Department of Justice ruled that real estate brokers can not use the term “free” when describing their services to prospective home buyers. That’s because the buyer agent does get paid a commission at the time of closing.

As the homebuyer, you do not necessarily write a check to your agent once you start shopping for properties. However, there are embedded agent commissions that are baked into your home purchase price when you hire a Realtor to purchase a home.

By not retaining a buyer agent, you essentially make your offer more competitive and give yourself a higher likelihood of the seller accepting your offer. A consumer could theoretically purchase a home for 3% less than the advertised asking price if the homebuyer negotiated directly with the seller, instead of hiring a buyer agent.

For example, you could make an offer of $291,000 on a $300,000 home and this would be equivalent to a $300,000 offer from a 2nd buyer who is using an agent. This is because a $291,000 offer with no buyer agent commission is equal to a $300,000 with a 3% buyer agent commission. In other words, the net proceeds would be the same to the seller in either case. Check out this resource to learn more about how buyer agent commissions work.

Control and transparency

One of the most difficult aspects of buying a home is that consumer home buyers lack control and transparency into what’s happening with their offer, their inspection, their appraisal, their mortgage or their closing. This is because the agent controls the flow of information for most of these steps.

When you represent yourself and decline to hire an agent, you now become the primary point of contact for showings, offers (and counter-offers), inspection findings, closing date, etc. To many consumers, this is an empowering feeling because now there is no intermediary and you control the process from start to finish.

Not getting ignored

One issue that can frustrate many homebuyers is lack of attention from their real estate agent, waiting for them to respond or occasionally even getting ignored by their agent.

Keep in mind that a busy agent may be handling multiple clients at the same time. Agents need to juggle multiple clients to earn a decent income. The downside is that you may not be their highest priority, especially if they have clients that are working with other buyers or sellers that have more expensive properties. If your agent also works with a lot of home sellers, they’ll have to juggle listings as well, which can be time-consuming and distract from giving you their complete attention.

Risks of going solo, without an agent

There are several advantages when it comes to hiring real estate agent. First off, Realtors are licensed and are bound by state laws. Experienced agents are very familiar with the language and terms of the purchase contract because they’ve used in many, many times. A good agent may help you structure an offer in a more competitive way that could help you win in a competitive, multiple offer situation.

Access to resources, contractors and other pros

Agents can also provide access to resources that may improve your overall experience. For example, an agent may have lenders, inspectors, contractors and attorneys in their contact list. This means if that you won’t have to find a home inspector or a a closing attorney (or title company) on your own.

Experienced agents also have access to local loan officers that may be helpful in securing a mortgage for a unique purchase situation like a jumbo loan or a bridge loan. For conventional, 30-year mortgages you’ll likely be find shopping online for rates.

Negotiation experience

Just like with any other major purchase transaction, a good negotiator is a must. Generally, an experienced real estate agent to know the market and can use this data to help you get a better deal on the house. They are aware of the latest market trends and how market conditions might impact your offer price on a home. Sometimes your buyer agent can have a candid pricing conversation with the listing agent – a conversation that may be more difficult for you to navigate on with the listing agent by yourself.

Knowledge of home repair findings

Once you go under contract and perform the inspection, you’ll likely find a handful of items that need to be addressed before closing. Assuming you are not purchasing the home “as-is”, you’ll want to know if these items are serious enough to necessitate repairs or monetary concessions in lieu of repairs. A good agent will be able to get these items fixed by the seller or have the seller agree to provide a cash contribution towards repairs at the time of closing.

Conclusion: To hire or not to hire?

The answer depends on your knowledge of the local market, your financial resources, your ability to do independent research and also your level of comfort managing a complex transaction. If you’re looking for hand-holding, guidance and step-by-step management of the transaction, then hiring an agent may be your best choice.

If you want some degree of guidance but don’t want to sacrifice the embedded costs of using an agent, consider SimpleShowing’s home buyer refund program – which credits buyers with up to half of the agent commission towards closing costs. (1.5% or about $5,000 on average).

4 Steps to a Pet-Friendly Living Room

If you’re a pet lover, chances are you want your furry friend to be able to join you in all aspects of your life – including lounging around in the living room. Luckily, there are some simple steps you can take to make your living room more pet-friendly. In this blog post, we will discuss four easy ways to make your living room more accommodating for pets!

What type of pet do you have?

The first step in making your living room more pet friendly is to take into account what type of pet you have. Each type of animal has different needs and preferences, so it’s important to consider these when creating a space for them. For example, if you have a small dog, you may want to create a cozy nook for them with a soft bed and some toys. On the other hand, if you have a cat, you may want to create a perching spot for them on a high shelf or piece of furniture. As long as you take your pet’s needs into account, you’re off to a good start!

In addition, before you consider making any changes to your living room, it’s important to do a quick assessment of your pet’s current behavior. If your pet is already comfortable in the living room and isn’t causing any damage, you may not need to make any changes at all! However, if your pet is exhibiting destructive behaviors or is generally anxious in the space, some simple changes may be needed to help them feel more at ease.

1. Choose pet-friendly furniture

When picking out new furniture for your living room, be sure to choose pieces that are easy for your pet to climb on and off of. A soft couch or chair with no sharp edges is ideal. You may also want to consider investing in a pet bed that can be stored away when not in use.

For instance, there are plenty of ottomans and coffee tables on the market that has built-in storage space – perfect for tucking away pet beds or toys! On the other hand, you can find sliding shutters available at Shuttercraft that can be used to quickly and easily close off any gaps in furniture that may be inviting to pets. Similarly, cats love to scratch furniture, so if you have a feline friend, be sure to choose materials that are resistant to scratches, like leather or faux leather.

2. Keep dangerous items out of reach

Pets can be curious creatures, and it’s important to make sure they can’t get into anything that could hurt them. Keep any cleaning supplies, medicines, or other dangerous items stored away in a cabinet or cupboard that your pet can’t access. Namely, be sure to keep any toxic houseplants out of reach as well – many common plants are poisonous to animals. For example, aloe vera, lilies, and dieffenbachia are all poisonous to cats and dogs if ingested. If you want to keep these plants in your home, be sure to place them on a high shelf or in a room that your pet doesn’t have access to.

3. Consider your flooring

If you have hardwood floors, be aware that pets can scratch them with their nails. This can be prevented by trimming your pet’s nails regularly or by placing mats or rugs down in areas where they like to lounge or play.

If you have carpeted floors, be sure to vacuum regularly to prevent pet hair from building up. The carpet may also require more frequent cleaning if your pet has accidents or sheds excessively. Therefore, it’s a good idea to keep a pet stain remover on hand just in case! Another option is to invest in washable rugs or throws that can easily be cleaned if they become soiled.

4. Add some pet-friendly accessories

To make your living room even more pet friendly, consider adding some accessories that your pet will enjoy. For example, you could add a cat tree or scratching post for your feline friend, or a set of steps or ramps for your dog to use to get on and off of furniture.

You could also add some toys or chew bones for your pet to play with, as well as some cozy bedding for them to snuggle up in. By adding these types of pet-friendly accessories, you’re sure to make your living room even more welcoming for your furry friend!

By following the tips above, you can easily make your living room more pet-friendly in no time! Just choose furniture and flooring that are durable and easy to clean, keep dangerous items out of reach, and add some pet-friendly accessories to make the space, even more, inviting for your furry friend. With a little bit of effort, you’re sure to create a living area that both you and your pet will love spending time in!

Planning to Renovate Your Bathroom? Here’s How to Prepare

Are you planning to renovate your bathroom? If so, it’s important to prepare properly before beginning the project. There are a few things you need to do in order to ensure that the renovation goes as smoothly as possible. In this blog post, we will discuss the steps you need to take before starting a bathroom renovation. We’ll also provide some tips for staying organized and avoiding common mistakes. Let’s get started!

Create a budget for renovations

The first step in preparing for a bathroom renovation is to create a budget. Determine how much you can afford to spend on the project and then allocate funds accordingly. Be sure to include the cost of materials, labor, and any other associated expenses in your budget.

A good idea is to create a spreadsheet or use a budgeting app to track your expenses. This will help you stay on track and avoid overspending. Once you have finished one task, you can easily see how much money is left in your budget.

Hire a qualified contractor

If you’re not planning on doing the renovation yourself, it’s important to hire a qualified contractor. Be sure to get estimates from multiple contractors before making your final decision. Ask for references and check reviews online to ensure that you’re hiring a reputable company. Namely, the experts from Calgary bathroom renovations company advise making sure your chosen contractor is licensed and insured. Additionally, be sure to have a detailed contract in place before work begins. This should include the scope of work, timelines, and payment schedule. Having everything in writing will help avoid misunderstandings and potential legal problems down the road.

Select your materials

Another important step in preparing for a bathroom renovation is choosing the right materials. There are many different options available, so it’s important to do your research before making any decisions. Consider the cost, durability, and appearance of different materials before making your final selection.

Once you’ve selected the materials you want to use, be sure to order them in advance so that they’re ready when the renovation begins. This will help avoid delays and keep the project on track. Also, check if the items you picked out are in stock before making any final decisions.

Schedule the renovation around your life

It’s important to schedule the renovation around your life so that it doesn’t disrupt your daily routine. If you have children, for example, you may want to wait until they’re out of school for the summer before starting the project. This will allow them to stay with friends or relatives while the work is being done.

For instance, if you work from home, you may want to consider renting a temporary office space during the renovation. This will allow you to focus on your work without being distracted by the construction.

Prepare your home for construction

Once you’ve hired a contractor and scheduled the renovation, it’s time to prepare your home for construction. This includes things like moving furniture out of the way, removing personal items from the bathroom, and covering floors and surfaces with drop cloths.

On the other hand, if you’re doing the renovation yourself, you’ll need to rent or purchase the necessary equipment. This includes things like ladders, power tools, and safety gear. Be sure to read the instructions carefully before using any new equipment.

Choose your fixtures and materials

Once you have a budget in place, it’s time to start choosing the fixtures and materials for your bathroom renovation. There are many options to choose from, so take your time and select the products that you love.

Be sure to compare prices and read reviews before making any final decisions. Also, be sure to order enough materials to complete the project. This will help avoid delays and additional costs.

Have an emergency fund

Things always have a way of going wrong, so it’s important to have an emergency fund set aside for your bathroom renovation.

This will help you cover unexpected costs and keep the project on track. Be sure to put the money in a safe place where you can access it quickly if needed. This could be a savings account or a separate account that you set up specifically for the renovation. Also, be sure to tell your contractor about the emergency fund so that they’re aware of it in case something goes wrong.

Bathroom renovations can be a big project, but with proper planning, they can go smoothly. Be sure to budget for the entire project, hire a qualified contractor, and prepare your home for construction. By following these tips, you can ensure that your bathroom renovation goes as planned.

5 Outdoor Home Maintenance Tips For Property Owners

Proper home maintenance is critical to keep your property in good condition, attract potential buyers, and keep current tenants happy. With proper upkeep, your home can withstand any outdoor or weather element all year round.

However, home maintenance isn’t only limited to its interiors. It’s also essential to attend to your home’s exterior maintenance. As stated by a 2020 survey, 57% of property owners focus more on upgrading and maintaining their home’s outdoor area.

Yet, despite its importance and necessity, outdoor home maintenance can be a huge time and money drain, especially if you’re unsure of where and how to start. But with the right planning and mindset, you wouldn’t need to go through all the fuss of maintaining your home’s outdoor area. This article will present a few tips to help property owners like you manage exterior home maintenance with minimal issues along the way.

Update your home’s landscaping

Among the first things that passersby and potential buyers will see when viewing your house is its landscape. Maintaining and keeping up with your home’s landscape maintenance can significantly influence how people perceive your property’s value and overall appeal. Furthermore, as per research, a well-landscaped property has a huge price advantage compared with houses that have none. And the advantage can range from 5.5% to 12.7%, depending on the type of landscaping project done.

So, step outside more often and clean up all the clutter on your landscape. Rake up the leaves and dead grass on the ground and eliminate all the weed infesting your yard. Reseed and fill in any bald patches in your lawn to improve the overall look of your grass.

The Hometown Concrete Leveling team recommends hiring a professional landscaping service to help you maintain and update your home’s landscape regularly. This will save you time and effort in managing your property’s outdoor area while ensuring that it remains visually appealing.

For low maintenance landscaping, you may focus on incorporating native flowers or plants since they require little maintenance and can thrive well in your region’s natural climate, unlike exotic plants. Lay more mulch on your flower beds as well to protect your plants and prevent weed growth. Generally, the best time to clean up and update your home’s landscape is during spring, although some of these tasks may be done at any time of the year.

Repair the driveway or pathway

Your driveway or pathway is a big part of your property’s curb appeal. Those small cracks on the path may be unnoticeable initially, but they can develop into bigger cracks when left unfixed for a long time.

Aside from being unsightly, cracked concrete on the path poses hazards to you, your tenants, or potential buyers. For instance, it can be a trip hazard to people and can damage cars, especially when it’s too deep. The cracks can also be the perfect spot for mold to grow and spread, causing the concrete to look even more unappealing and become slippery.

Thus, the moment you spot any small or big cracks on your driveway or pathway, have them fixed immediately. If the cracks or holes are less than ¼ inches, you may patch or fill them yourself or seek professional assistance. But if the damages are larger than ¼ inches and are already sinking or discolored, or the damage comes from underneath, you’ll need to hire a contractor for repair or restoration.

Inspect your roof

How often do you think about your property’s current roof condition? Many property owners often forget the roof because it’s located above and isn’t always seen at eye level. But the thing is, inspecting your roof regularly is vital to prevent costly roof repairs or replacements in the future.

Usually, the easiest and safest way to check your roof is to use binoculars. With a binocular, you can see if any loose or missing shingles need immediate repair.

For extensive roof inspection, enlist the help of a professional roofer. They have the proper equipment and gear to climb onto roofs and closely inspect the whole roofing system for possible damages. During an inspection, they’ll examine the chimney (if you have one), gutter system, and attic for any possible damage or existing leak that may call for immediate repair.

Clean and repair the deck

Regular cleaning and maintenance of your deck is the key to keeping it in its best shape. However, it’ll require more work if the deck has visible cracks, decay, or loose boards. Hire a contractor to help repair the loose boards or replace the ones with cracks or deterioration.

Moreover, watch out for any holes on the board, as they could be a sign of insects. Once the boards are fixed, you may clean the entire deck using a pressure washer to eliminate dirt, algae, mold, or mildew. After cleaning, make sure to reapply a waterproofing coating too.

Repaint whatever needs a touch-up

Exterior painting can lead to a 55% return on investment, which means it’s an effective way to boost property value. So, assess your property’s exterior and look for areas that need repaint or a touch-up. Some areas to look at when painting and maintaining your home’s exteriors are the doors, exterior walls, fence, and mailbox posts. Remember that painting touch-ups are only suitable if the areas only need a little dab of paint.

But if you’ve been falling behind with your home’s exterior maintenance, some of these areas may need an entire repaint job. In that case, it’s best to avail of professional services.

Wrapping up

Part of your responsibility as a property owner is to maintain the outdoor area, especially if you’re planning to sell or rent your place. Taking care of your home isn’t only about boosting your property value or increasing your return on investment. It’s also about ensuring that a buyer or a tenant has a comfortable, safe, and visually appealing home to live in. So, when the weather is pleasant, follow these maintenance tips to upgrade your outdoor area.