Which Zoysia Variety is Best for Southern Lawns?

Anyone who’s cultivated plants in the southern United States knows the challenges of keeping things healthy and growing. Most parts of the south are known for being hot and dry, so you can’t just plant whatever you want outdoors and expect it to thrive. Some plants can survive these conditions by being grown in shady areas, or by getting watered more frequently. Lawn grass, on the other hand, needs to be able to handle itself against heat and drought.

Fortunately, varieties like Bermuda, St. Augustine, and Zoysia are known for their resistance to drought. What if you want your lawn to do more than just survive dry conditions, though? You can choose something like Zeon Zoysia, a type of Zoysia that’s known for its deep green color and resistance to insects. There are several different kinds to choose from; the ones that are most ideal for southern lawns will be discussed below.
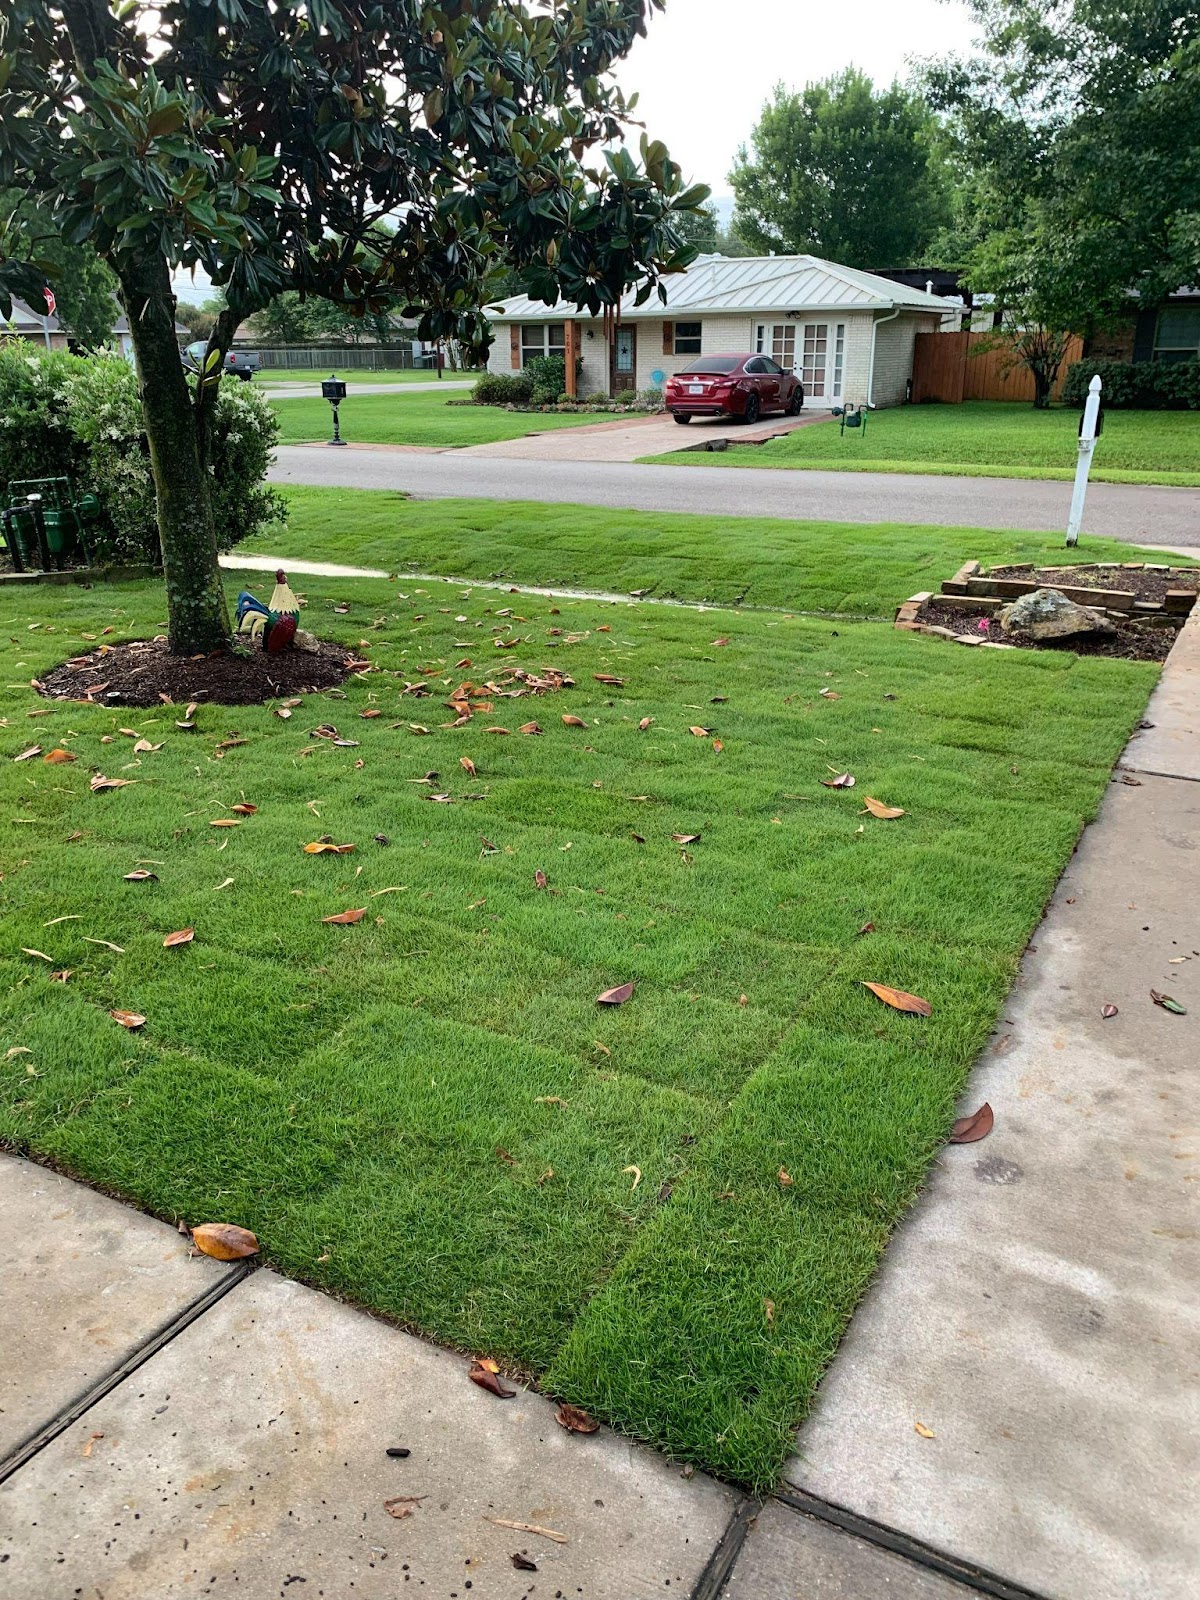
Zeon Zoysia

This is considered to be a “premium” Zoysia, and for good reason. It has a vivid green hue, and a fine yet dense texture. It can grow well in the southern heat, but it can also tolerate colder temperatures. If you want your lawn to stay greener for longer, this is one good option; Zeon Zoysia turns brown later in the year, and then green earlier in the spring compared to other types of Zoysia. It also scores well for resistance to diseases and insects, and grows quickly. This particular type is a fine-bladed grass, which means a slower buildup of thatch. A lawn of Zeon Zoysia requires less maintenance overall, and is more likely to stay healthy without much interference.

Zeon Zoysia summary:

  • Can tolerate shade better than other types of Zoysia
  • Tolerates drought well
  • Dark green in color
  • Short, fine blades of grass
  • Takes more time to establish itself compared to Empire Zoysia
  • Is barefoot-friendly
  • Is insect-resistant
  • Has less buildup of thatch

Emerald Zoysia

Here’s another top-quality Zoysia variety. It has the characteristics you’d expect, such as drought resistance and a bright green hue. However, it’s a bit more shade tolerant than some Zoysia varieties; it actually comes close to the same shade tolerance as St. Augustine. Full shade won’t work for Emerald Zoysia, but it only needs around three to four hours of sun per day for healthy growth. Aside from its color, this grass is set apart by the fine texture of its blades.

Emerald Zoysia summary

  • Intense green color
  • Soft feel underfoot
  • Shade tolerant
  • Turns green quickly each spring
  • Drought tolerant

Palisades Zoysia

This variety of Zoysia is known for the rate at which it can grow and spread. It has a decent shade tolerance, and requires fairly little water – around 1.5 to 2 inches weekly. It prefers plenty of sunlight, and needs at least six hours of sunlight daily. Palisades Zoysia does well in high-traffic areas, thanks to its ability to rapidly recuperate from environmental stressors. As a high-density, coarse-textured turf that requires little maintenance, it’s easy to see why Palisades Zoysia is so popular.

Palisades Zoysia summary

  • Medium to dark green color
  • Dense foliage with medium-sized blades
  • Moderately shade tolerant
  • Recuperates quickly from drought, foot traffic, etc.
  • Drought tolerant

Cavalier Zoysia

Cavalier Zoysia is a fine-bladed variant, with great shade tolerance – it only needs around four to five hours of direct sunlight daily. It grows thickly, producing a dark-green lawn that’s very aesthetically pleasing; many people think it looks similar to Bermuda grass. It’s also very hardy, so it’s unlikely to be affected by drought or disease. This grass grows a bit more slowly than others, so you won’t have to mow it quite as often.

Cavalier Zoysia summary

  • Dark green color
  • Fine blades and dense growth
  • Shade tolerant
  • Drought tolerant
  • Low-maintenance due to slower growing time

What you need to know about growing Zoysia

Zoysia comes in many different varieties, all of which are known for their general hardiness and aesthetic appeal. It’s a warm-season grass, which makes it more suitable for southern states. Here are a few more details that are handy to know if you’re interested in Zoysia for your yard.

  • Where Zoysia likes to grow

Most types of Zoysia like hot temperatures. They can survive in hardiness zones 6 – 8, but they’ll grow very slowly and stay dormant for a large portion of the year. They do best in zones 9 – 11, growing more quickly (and needing more frequent mowing). As long as you live above a hardiness zone 6 (which encompasses the southern states), and have plenty of sunlight in your yard, Zoysia should be the right grass for you.

  • How much water Zoysia needs

The type of grass you grow in your lawn can have a big impact on your water bill, which is why so many people love Zoysia. It needs about an inch of water each week to thrive, and can generally flourish under all but the harshest watering restrictions.

  • How much sunlight Zoysia needs

There are a few varieties that can survive partial shade, but all of them prefer being in full sunlight. This helps the grass grow thick and tall; shaded areas are likely to contain thinned-out grass that doesn’t grow as quickly. Properties with a lot of trees or privacy fences may not be ideal for Zoysia.

  • How much fertilizer Zoysia needs

In general, most Zoysia varieties will grow just fine as long as you leave the grass clippings to compost back into the soil. However, some of them will give you better results with the help of nitrogen fertilizer. If you have one of these varieties, you’ll probably end up needing between two and four pounds of fertilizer for every 1,000 square feet of grass.

The takeaway

The grasses in southern lawns need certain characteristics if they’re going to thrive, and several Zoysia varieties have these characteristics in abundance. From drought and pest resistance, to the ability to grow a thick, gorgeous carpet of grass, there’s a lot to appreciate about these types of Zoysia.

How Long Does it Take to Get a Real Estate License

If you’re considering a career in real estate, one of the first things you’ll need to do is obtain a real estate license. But how long does it take to get a real estate license? The answer depends on several factors, including your state’s licensing requirements, how long it takes you to complete your pre-licensing education, and how quickly you’re able to pass the licensing exam.

How Long Does it Take to Get Your Real Estate License?

You’ll want to start your real estate career by completing a pre-licensing course at one of the various real estate schools. Completing a real estate license application involves meeting education requirements, finding a sponsoring broker, and securing approval from your local real estate commission. The time to obtain real estate licenses varies but expect several weeks to a 3 months for the entire process.

Every State is Different

It’s important to note that each state has its own real estate license requirements and process. For example, the Texas real estate license process may differ slightly from Florida or that of other states. In general, most states require applicants to complete a certain number of pre-licensing education hours, pass a licensing exam, and submit an application for licensure. Some states may also require a background check or other additional requirements, such as a high school diploma.

How to Complete Your Pre-Licensing

To get started, you’ll typically need to complete your pre-licensing education. This coursework can typically be completed through a real estate school or institution, either in-person or online. Depending on your state, you may need to complete between 60 and 180 hours of education. In general, most states have pre licensing requirements that can be completed online.

Real Estate School Options

Online real estate school offers a flexible option for those who prefer to study on their own schedule, and may be able to complete their education more quickly. You could still go in person, but online real estate courses have become very popular since in the last few years and offer a path to getting licensure via a very flexible format. Online programs are challenging, but not difficult to complete.

How Long Do You Need to Study?

The amount of time it takes to complete your pre-licensing education can vary based on your availability and the course schedule. Accelerated courses may be available that allow you to complete the required hours in just a few weeks. Alternatively, if you’re taking courses on a part-time basis, it may take several months to complete the necessary education.

After completing your pre-licensing education, you’ll need to pass a licensing exam. The real estate exam consists of two parts: a national portion and a state-specific portion. The national portion covers general real estate concepts and practices that apply across the country, while the state licensing exam tests your knowledge of your state’s real estate laws and regulations.

How Many Times Does it Take to Pass the Exam?

The length of time it takes to prepare for the real estate license exam can vary based on your study habits and how much time you have available to devote to studying. You may want to consider taking a test prep course or using study materials to help you prepare. Many people spend several weeks to a few months preparing for the exam.

Real Estate Exam

Passing the real estate licensing exam is not guaranteed, and some people may need to take the exam multiple times before passing. However, with the right preparation, plus the use of practice exams, you can increase your chances of passing on the first attempt.

Once you’ve passed the exam, you’ll need to submit an application for licensure to your state’s real estate regulatory agency. This application typically involves submitting your exam scores, completing a background check, and paying a licensing fee. Depending on your state, it may take a few weeks to a few months to receive your license after your application is approved.

How long it takes to get a real estate license

As you can see, there are a few steps to getting licensed. But in general, you can complete your licensing within 4-6 weeks if you move fast, work on it full time and utilize online courses to speed up the process. If you’re pursuing real estate education on a part-time basis, it is more likely to take 3 months or more to finish.

It’s also important to know that once you’re a real estate agent, you are not required to become a Realtor. To be a Realtor vs an ordinary agent, you won’t need to take any additional exams or coursework, but instead you’ll need to pay dues to the national and local Realtor Board in your area.

Your First 30 Days After Obtaining Your License

Most new real estate agents start out with great enthusiasm and but struggle to get early traction with new listings or buyer clients. We recommend working with a tenured real estate broker or agent for the first 6 months to learn the local purchase contract, how to use your MLS and how to find clients. You’ll also want to consider investing in lead generation tools or software to help you get off to a fast start.

Whether you’re working with sellers, buyers or real estate investors, a good CRM can help you understand which one of your contacts are quality leads and make sure those leads are nurtured over time. You’ll also want to use social media to improve your brand awareness, whether by posting organically or using paid campaigns.

Conclusion

In conclusion, obtaining a real estate license requires completing a certain number of pre-licensing education hours, passing a licensing exam, and submitting an application for licensure. The timeline for this process can vary based on your state’s requirements, how long it takes you to complete your education, and how quickly you’re able to pass the exam. However, with the right preparation and dedication, you can become a licensed real estate agent, earn commission and enjoy all the benefits that come with this exciting industry.

How to Prepare Your Home for Sale After a Tenant Moves Out

Preparing a rental property for sale can be a daunting task, especially if you’ve had tenants living in the property. Whether you’re a seasoned landlord or a first-time seller, there are certain steps you can take to ensure your property is in top condition before putting it on the market.

In this blog, we’ll cover everything you need to know to prepare your home for sale after a tenant moves out.

Ensure Your Rental Agreement Requires the Tenant to Pay for Damages

One of the most important things you can do as a landlord is to ensure that your rental agreement includes language that holds the tenant responsible for any damages they may cause to the property.

This means that if the tenant causes any damage during their tenancy, they will be responsible for paying for the repairs.

Use a template to make sure all terms are included that way your tenant doesn’t get away with not paying for a broken window. This not only protects you as a landlord but also ensures that the property is in good condition when it’s time to sell.

Complete a Walk Through When They Move Out

When your tenant moves out, it’s essential to complete a thorough walk-through of the property to assess any damages that may have occurred during their tenancy.

This will give you a clear picture of the condition of the property and help you determine what repairs or updates may be necessary before putting it on the market. Be sure to document any damage you find with photos or video to use as evidence.

Check to See if Any Additional Damage is Covered by Insurance

Having homeowners insurance is vital when you own a home. Let’s say there’s damage that your tenant isn’t responsible for. Then the next step would be to go to your insurance.

For example, if a fire that your tenant didn’t start damages part of the property your insurance may be able to help you cover the costs of repair.

Clean the Property: With Tips

Once your tenant has moved out, and you’ve completed a walk-through of the property, it’s time to start cleaning. A clean property not only looks better but also makes it easier for potential buyers to envision themselves living there.

Here are five tips for cleaning a rental property before putting it on the market:

  1. Start with the Walls: Over time, rental properties can accumulate dirt, scuffs, and even damage to the walls. Before you start deep-cleaning the rest of the property, give the walls a good scrub with a mild cleaner to remove any dirt or grime.
  2. Don’t Forget the Floors: Whether you have carpet, hardwood, or tile, it’s important to give your floors a thorough cleaning. Consider renting a carpet cleaner or hiring a professional cleaning company to ensure that your floors look their best.
  3. Clean the Appliances: The appliances in a rental property can take a beating over time, so it’s indispensable to give them a good cleaning before putting the property on the market. This includes the refrigerator, stove, dishwasher, and any other appliances that will be included in the sale.
  4. Dust and Clean Surfaces: Once you’ve tackled the walls, floors, and appliances, it’s time to dust and clean all the surfaces on the property. This includes countertops, windowsills, and any other areas that may have accumulated dust or dirt over time.
  5. Hire a Professional Cleaning Company: If you’re short on time or simply don’t want to deal with the hassle of deep cleaning a rental property, consider hiring a professional cleaning company to do the job for you. This can save you time and ensure that the property is in top condition before putting it on the market.

A clean bathroom itself is also key to selling a home, so make sure all toilets are unclogged and painted with a new layer of paint.

<H2>Buying New Furniture to Make the Sale</H2>

In addition to the repairs and cleaning, another way to prepare your rental property for sale is by updating the furniture. New decor isn’t just for increased productivity, some people decide to include furniture or appliances like a hot tub or new sofa to raise the price of the home.

Replacing old, worn-out furniture with new, modern pieces can make a big difference in the overall appearance and appeal of the property.

When choosing furniture, it’s essential to keep in mind the style and overall aesthetic of the property. Neutral, modern pieces are usually a safe bet and can help make the space feel fresh and inviting.

Investing in new furniture may seem like an added expense, but it can pay off in the long run by attracting more potential buyers and ultimately leading to a higher sale price. Plus, if you select the right pieces, you can take them with you to your new home or even use them to stage the property during open houses.

Best Landscape Edging & Borders

Have you been looking for the best landscape edging options to help turn your garden or backyard into a beautiful outdoor oasis? Whether you’re aiming to incorporate something modern and chic, classic and timeless, or something in between, there is no shortage of possibilities for finding the right landscape edging. Improving the look and feel of your flower beds, garden or walkways is one of the top gardening tips and one of the best things you can do for your curb appeal.

Let’s explore all of your landscape edging needs! Keep reading as we explore which type is the perfect fit for your project.

Best Landscape Edging

With so many different materials and styles available, finding the perfect edging for your yard can be overwhelming. To help make your decision much easier, here’s our review of some of the best landscape edging on the market.

Best Overall: Easy Flex Heavy-Duty No-Dig Edging

Easy Flex Heavy-Duty No-Dig Landscape Edging is perfect for budget-conscious buyers. It has a flexible design at just $9 per roll that fits any shape without bending or buckling. It’s strong against weeds and mowing damage and has UV protection to prevent fading over time.

Best Metal Edging: EverEdge Steel Landscape Edging

Metal edging tends to be the best option for garden beds that are sloped and can prevent thick mulch from spilling over into the yard. Typically, homeowners want to create a functional yet attractive division between a garden bed and the adjoining lawn. If the grass is thick and deep, you’ll need edging of at least 10″, if not more. Rubber edging or plastic/poly edging can do the trick, but for really thick and intrusive lawns, metal edging is even more effective.

EverEdge Landscape Edging offers an elegant metal look for your landscaping. Made of recycled steel slats, it’s both strong and lightweight. It’s easy to install by hammering it into place and is suitable for residential and commercial use.

Best Budget Option: Instant Edging, Premium Black with Stakes

If you’re looking for a quick affordable lawn edging option, Instant Edging – Black 20ft Premium No Dig Yard Edging Kit is a great choice. This landscape edging material is perfect for decorative purposes, with intricate patterns made from recycled polyethylene treated with UV inhibitors.

It comes in one roll of 20ft x (2″ high) instant edging & 18 stakes. It’s ideal for flower beds, sidewalks, and other areas where you want to create a visually appealing and functional border.

Check out The Benefits Of Edging A Lawn.

Best Environmentally Friendly: Gardener’s Supply Company Recycled Rubber Mulch Edging

Plow & Hearth Recycled Rubber Mulch Edging prevents grass encroachment and moves when mowed over, avoiding damage. Made of 100% recycled rubber, it requires less maintenance and saves time and money.

Best Fence Edging: Gardener’s Supply Company Oxford Border Edging

Gardener’s Supply Company Oxford Border Fencing is a creative option for larger projects. Each kit includes sixty 4 ft sections consisting of 8 interconnecting panels made from high-grade recyclable PVC, requiring little maintenance and offering incredible durability. Great for defining property lines and keeping pets out of certain areas.

Best Barrier/Border Edging: Grass Barrier Landscape Edging 10″ Inch Depth

Grass Barrier Material

If you’re looking for the best border barrier for grass, weeds or plants, consider using Grass Barrier Landscape Edging 10″. This durable option is made from reinforced polyethylene with UV inhibitors, making it weather resistant. Its 10″ depth creates a permanent barrier that prevents grass from spreading. This landscape edging material is also easy to install but you have to take extra care keeping the edging straight.

Conclusion

If you’ve been looking to create a beautiful outdoor oasis, now you can see that there are plenty of options to consider when choosing the right landscape edging. Whether your aesthetic is modern, chic, classic, or timeless, every project has a landscape edging fit that’s sure to improve curb appeal and provide an instant upgrade to your yard or garden.

From innovative designs with practical uses to aesthetically pleasing lines tailored to fit budgets, these options will help you create attractive landscape borders with durable edging. To go along with your new flower bed, check out our list of best garden hoses.

Utilize these helpful guidelines to get the perfect landscape edging for your outdoor space. Now, go forth and turn your garden into a beautiful outdoor oasis!

A Guide on How to Finance Your Dream Fence

If you’re considering getting a fence for your yard, maybe you have a particular one in mind. There are several different fence styles. Some are more costly, while others are relatively inexpensive.

If you feel this is the year you’ll move forward and get your fence, you’ll naturally have some questions. How much is an appropriate price to pay for this purchase? Can you finance a fence? If you can, then what kind of payment structure makes the most sense?

We will answer each of those questions in the following article. Keep reading as we explain the best way to get your dream fence in 2023.

Is It Possible to Finance a Fence?

The first thing worth knowing is that it is indeed possible to finance a fence. You can do so in several different ways. The first is to pay for the fence in installments. If you do this, you could set up a financing plan directly with the company selling you the fence and erecting it.

The company will probably expect you to put some money down when they start the project. You’ll sign a contract and then hand over the amount of money to which you agreed. You might give the company a check or money order, though some accept credit cards as well.  

Like financing a car or anything else, it usually makes sense to put as much down for the fence in the beginning as you can afford. That means you will have fewer payments in the future, and those payments will be for less money.

You might pay for the fence over the next year or two. Depending on your agreement with the company installing it, you may give them monthly payments until you’ve paid off the full amount. Quarterly payments are also possible.

Do You Have Other Financing Options?

You might also approach a lending entity like a credit union or bank and ask them for a loan. You can use that loan to buy the fence. If you do this, you’ll usually pay in full. Then, you’ll owe the lender money instead of the fence company.

Doing this might make sense if you have good credit. If you do, then you should be able to secure a low interest rate on your loan. If you have a decent credit score and a steady job, then there’s a good chance the lender will approve your loan.

The only drawback with this method is that you must pay interest on the loan until you pay all of it back. Many times, when you set up financing with the fence company, you will pay no interest. You must simply pay for the fence in set installments according to the contract terms to which you agreed.  

How Much Does the Average Fence Cost?

The average fence costs anywhere from $2,000 to $4,500. However, you might buy one for as little as a few hundred dollars in some instances. You might also pay considerably more.

With fences, the style you get makes a huge price difference. If you get a custom-made, stockade-style wooden fence, it makes sense that it would cost more than a simple chain-link one. You must also factor in how big of a yard you’re trying to enclose.

Should You Finance a Fence?

Financing a fence makes sense if you want one to enclose your yard, and you can’t pay for it all at once. You can finance with the fence company and pay what you owe according to the contract terms to which you agree.

You might get a personal loan from a credit union or bank. That works as well, though you must pay interest on the loan until you’ve paid it back.

Either way, you’ll enjoy your new fence, and it should add to your property’s value.

Cheapest Ways to Buy a House

Tired of renting and ready to buy that starter home you’ve been dreaming about? Whether you’re a first-time homebuyer or you’re just looking to save money on earnest money and closing costs, we’ve got you covered!

Buying a home can be an expensive endeavor. Here’s a quick breakdown of the normal cost to buy a home in the US.

  • Earnest money deposit upon contract signing (1% of purchase price)
  • Mortgage down payment (minimum of 3% of purchase price)
  • Closing costs including lender and title company fees (2% of purchase price)

If you add all of these amount up, you’ll end up needing at least 5-6% of the home sales price in cash and that’s being optimistic. Technically the 1% earnest money gets backed out of your “cash to close” amount, but more on that later.

After all the fees above are added up, you’d need $18,000 in cash to buy a $300,000 house. This represents 6% of the final sales price. Now let’s look at ways to reduce the amount needed to buy a home.

Cheap Ways to Buy a House

Using a combination of the approaches below, you can buy a house for as little as 0-3% of the purchase price versus the typical 6%. Some of these approaches require creativity and negotiating skills, while others have specific eligibility requirements.

Only put down 3% as your down payment

Conventional mortgages require at least 3% down, while FHA requires at least 3.5% down. Limit your out-of-pocket expenses by making the minimum down payment amount.

Ask the seller to pay up to 3% in “seller contribution”

A home seller can give you up to 3% of the sales price of the home to offset your “cash to close” amount. On a $300,000 home, that’s $9,000 contributed by the seller and a big chunk of money you don’t have to come up with. Obviously, the seller won’t just give you the money because you asked. Your agent can help you structure your offer creatively and make the other terms attractive.

Use first-time homebuyer programs and grants

There are several federal and state programs available for first-time buyers and low-income borrowers.

Use a USDA or VA loan if eligible

If you’re a veteran or live in a rural area, you can get a mortgage with 0% down payment. You’ll still need to pay closing costs, however.

Try house hacking

House hacking has become a popular option for owner-investors who purchase a home (usually a duplex) and then rent out part of the property to offset their mortgage.

Closing cost assistance

We covered seller contributions, but you can get closing cost assistance from other parties. For example, SimpleShowing is a real estate brokerage that offers a 1% commission refund to home buyers in certain states.

Lender credits

This is particularly common when purchasing a new construction home, but many lenders will offer closing cost credits, which help you offset cash out of pocket for pre-paid or escrow fees.

Final tips on how to buy a house cheap

When purchasing a home, decide if your objective is to limit out of pocket expenses, get a mortgage good rate or buy under market value. It’s often difficult to do all three, especially in a hot real estate market.

When Does Seller Get Money After Closing?

If you’re selling a property and wondering when and how you’ll receive you’re proceeds, keep reading!

When a homeowner sells a property in the US, there is a funding authorization process that must be finalized prior to you receiving a bank wire (or check) for the proceeds of your sale.

The funding authorization is typically approved by the closing attorney and/or title company that this handling the closing. If the buyer of your home is using a mortgage to purchase the property, there is an additional approval needed from the bank’s underwriting or funding department. If the buyer is purchasing your home with cash, the process is a bit quicker and easier.

During a home closing, the deed (property title) is cleared and transferred into the buyer’s name and all documents are signed and reviewed. This includes the settlement statement and local and state level docs. For the buyer, additional signatures are needed on all lender docs from the bank.

How long does it take to get proceeds from a real estate sale?

The attorney or title company review all docs for omissions or errors and once approved, the wire is sent to the seller and also to other interested parties such as real estate companies, home insurance companies, etc. The vast majority of closing attorneys and title companies will disburse funds using wire transfer, which is deposited into your checking account the day of closing.

Typically, you will receive your funds about 2-3 hours after closing.

However, if your closing occurs late in the afternoon (after 3pm), you will likely not recieve your wire until the following business day. This means that Friday afternoon closings often do not fund until Monday, unfortunately.

How to Add a Room to a House Cheap (Affordable Home Addition)

Are you feeling cramped in your current living space? Do you dream of having an extra bedroom or a dedicated family room? Adding a room to your house can be a great way to create more living space and make your home more livable and enjoyable.

How to Add a Room to a House

The cost of a room addition can quickly add up, leaving many homeowners feeling discouraged. In this post, we’ll explore how to add a room to your house on a budget while still getting the functional space you need.

Bump out addition

A bump out addition is a type of room addition that involves expanding the footprint of an existing room by adding a small, but strategically placed, extension. Bump outs can be a cost-effective way to add more living space to your home, without the expense of a full room addition.

Bump outs can be used to create a larger kitchen, a larger bathroom, or a walk-in closet, and they can be customized to meet your specific needs. Because bump outs require less structural work than a full room addition, they can be completed more quickly and with less disruption to your daily routine. However, it’s important to work with a professional contractor to ensure that your additional room is structurally sound and meets local building codes.

Finish your basement space

Basements are common in some parts of the US and represent a great opportunity to add finished square footage without actually doing an addition.  If you have a basement and want to add square footage, this is definitely the first option to explore. You can definitely save money finishing a basement versus doing a bump out.

Add a dormer to your attic

Adding an attic dormer can be a great way to add extra living space to your home. An attic dormer is a structural addition to your roofline that allows you to expand your attic space into a fully livable and functional room. Dormers come in a variety of shapes and sizes, so you can customize the design to fit your specific needs and aesthetic preferences. Attic dormer room additions can be used for bedrooms, home offices, playrooms, or any other type of living space.

They can also add natural light to your home, which can make the space feel brighter and more inviting. Before adding an attic dormer, it’s important to work with a professional contractor to ensure that the project is feasible and that all building codes are met. With the right design and construction, an attic dormer room addition can be a beautiful and functional addition to your home.

Tips for an Addition and Adding Living Space

Focus on Square Footage

Adding square footage to your home can increase the overall living space and provide room for a new functional room. It’s important to remember that more square footage doesn’t necessarily mean more living space. Before adding a new room to your home, consider whether it will add to your living space or just increase the size of your home.

Convert an Existing Room

One of the most affordable ways to add a room to your house is to convert an existing space. If you have an unfinished basement or an underutilized room, you can transform it into a livable and enjoyable space. With a little creativity and some elbow grease, you can turn a basement into a family room or a laundry room, or a spare bedroom into a walk-in closet or home office.

Make it a Livable and Enjoyable Space

When adding a new room to your home, focus on creating a space that is both livable and enjoyable. This means choosing colors, furniture, and decor that make you feel comfortable and happy. You can also add features like built-in storage or a fireplace to make the space even more functional and inviting.

Consider a Family Room

If you’re looking for more living space, a family room can be a great option. This type of room is perfect for relaxing and spending time with family and friends. It can also be used for entertaining guests, watching movies, or playing games. A family room can be added to your home by converting an existing room, such as a formal dining room, or by building an addition onto your house.

Consider Adding a Laundry Room

If you’re struggling with limited storage space or an awkward laundry setup, adding a laundry room can be a game-changer. A laundry room can be added to your home by converting an existing space, such as a mudroom or utility room, or by building an addition onto your house. A functional laundry room can also increase the resale value of your home.

Think About Resale Value

When adding a new room to your home, it’s important to consider the resale value. While you may not be thinking about selling your home now, it’s always a good idea to think about the future. Adding a functional room, like a family room or a bedroom, can increase the resale value of your home and make it more attractive to potential buyers.

Focus on Storage Space

One of the most important aspects of any new room addition is storage space. Adding built-in storage, like shelves, cabinets, or a walk-in closet, can make the room more functional and help keep clutter under control. Storage space can also increase the resale value of your home and make it more attractive to potential buyers.

In conclusion, adding a room to your house can be an affordable and effective way to create more living space for a growing family or for facilitating work from home.

Best Backpack Vacuums for 2023

Backpack vacuums have become increasingly popular over the years due to their convenience, efficiency, and ease of use. These vacuum cleaners are a great option for people who have to clean large spaces or multiple areas, as they are designed to be lightweight, ergonomic, and portable. In this blog post, we’ll discuss the best backpack vacuums available in the market.

Best Backpack Vacuums

Our list of reviewed vacuums provide a choice for any budget or application. Whether you’re looking for a cordless option, a whisper quiet vacuum or a heavy-duty option, these are the top backpack vacuums on the market.

1. Hoover Commercial C2401 Backpack Vacuum (Best Overall)

The Hoover Commercial C2401 backpack vacuum is another popular choice among homeowners and professionals alike. This vacuum cleaner comes with a powerful 8.5-amp motor that provides strong suction power, and a 6.4-quart capacity tank that can hold a large amount of debris. It is designed to be lightweight and comfortable, with a shoulder strap and waist belt that distributes the weight evenly across your body. The Hoover Commercial C2401 also comes with a range of attachment tools, including a crevice tool, dusting brush, and upholstery tool.

2. ProTeam Pro-Vac FS6 Vacuum (Best Commercial Grade)

ProTeam backpack vacuums are one of the most popular choices among cleaning professionals. These vacuum cleaners are designed to be lightweight and comfortable, with an ergonomic harness that distributes the weight evenly across your back. They come with a range of features, including HEPA filters, adjustable suction, and different attachment tools. ProTeam backpack vacuums are also known for their high suction power, making them ideal for cleaning carpets, hard floors, and upholstery.

3. Atrix VACBP1 Backpack Vacuum (Best Value)

The Atrix VACBP1 backpack vacuum is a versatile and powerful option that is perfect for both residential and commercial cleaning. This vacuum cleaner features a 1,400-watt motor that provides powerful suction, and a HEPA filter that captures 99.97% of particles as small as 0.3 microns. It is designed to be lightweight and comfortable, with a padded harness that distributes the weight evenly across your back. The Atrix VACBP1 also comes with a range of attachment tools, including a floor tool, crevice tool, dusting brush, and upholstery tool.

4. Sanitaire EURSC412B Backpack Vacuum (Most Versatile)

The Sanitaire EURSC412B backpack vacuum is a popular choice among professional cleaners due to its powerful suction and lightweight design. This vacuum cleaner comes with a 5-amp motor that provides strong suction power, and a 6-quart capacity tank that can hold a large amount of debris. It is designed to be lightweight and comfortable, with an ergonomic harness that distributes the weight evenly across your back. The Sanitaire EURSC412B also comes with a range of attachment tools, including a crevice tool, dusting brush, and upholstery tool.

5. Prolux 2.0 Lightweight Backpack Vacuum (Best Cordless)

The Prolux 2.0 Lightweight Backpack Vacuum is a powerful and efficient option that is perfect for both residential and commercial cleaning. This vacuum cleaner features a 1,200-watt motor that provides strong suction power, and a HEPA filter that captures 99.97% of particles as small as 0.3 microns. It is designed to be lightweight and comfortable, with a padded harness that distributes the weight evenly across your back. The Prolux 2.0 Lightweight Backpack Vacuum also comes with a range of attachment tools, including a floor tool, crevice tool, dusting brush, and upholstery tool.

6. Powr-Flite Comfort Pro Vacuum (Most Quiet)

This is a great commercial option that features a light breathable mesh back panel providing airflow to keep you and your back up to 25% cooler. It’s powerful and features a 5-stage HEPA Filtration. It’s truly a commercial vacuum cleaner that provides improved indoor air quality by aiding to eliminate allergens and contaminated air particles; includes 80-feet of cleaning reach to maximize results. It has an extremely quiet operation with a superior 62 dBA rating; perfect for noise sensitive environments, but still provides the results of an industrial strength vacuum cleaner.

Tips for choosing the best backpack vacuum for your needs

When it comes to choosing the best backpack vacuum, there are several key features that you should consider. These features can make a big difference in terms of the vacuum’s performance, comfort, and overall value. Here are some of the top features to look for when buying a backpack vacuum:

  1. Suction power: The suction power of a backpack vacuum is a critical feature to consider. A powerful motor will ensure that the vacuum can pick up dirt, collect dust, and debris quickly and efficiently. Look for vacuums with high-wattage motors to ensure maximum suction power.

2. Corded vs Cordless: Below are factors to consider if you go with a cordless backpack vacuum option.

  • Portability: Cordless backpack vacuums are highly portable and allow you to clean without being tethered to a power outlet. This can be particularly useful for cleaning large areas or hard-to-reach spaces.
  • Battery life: Battery life is a critical factor to consider with cordless backpack vacuums. Look for models with long battery life that can last for an entire cleaning session.
  • Charging time: It’s also important to consider the charging time of the battery. Look for models that charge quickly, so you don’t have to wait long before using the vacuum again.

3. Capacity: Backpack vacuums come with different tank sizes, and you should choose one based on the size of the area you plan to clean. Larger tanks can hold more debris, which means less time spent emptying and refilling the vacuum.

4. Filtration: Backpack vacuums with HEPA filters are ideal for people with allergies or asthma. HEPA filters can capture particles as small as 0.3 microns, ensuring that the air you breathe is clean and free from allergens.

5. Attachment tools: Look for backpack vacuums that come with a range of attachment tools, such as crevice tools, dusting brushes, and upholstery tools. These tools can help you clean hard-to-reach areas and various surfaces effectively.

6. Ergonomics: A backpack vacuum should be comfortable to wear and use. Look for models with padded harnesses, adjustable straps, and ergonomic designs. This will ensure that you can clean for long periods without experiencing discomfort or fatigue.

7. Noise level: Backpack vacuums can be noisy, so it’s important to consider the noise level when making a purchase. Look for vacuums with low decibel ratings, which will ensure that you can clean without disturbing others.

8. Durability: A backpack vacuum is an investment, so you want to choose a model that will last for a long time. Look for vacuums made from high-quality materials and with strong warranties.

Conclusion

In conclusion, backpack vacuums are an excellent option for people who have to clean large spaces or multiple areas. They are designed to be lightweight, ergonomic, and portable, making them perfect for cleaning carpets, hard floors, and upholstery. When choosing a backpack vacuum, it is important to consider factors such as suction power, tank capacity, and attachment tools.

Best Sage Green Paint Colors

Are you looking to create a calming and serene atmosphere in your home? Sage green paint can be just the right option for that! It is an earthy shade of green with gray undertones, giving rooms a soft and peaceful feeling when used on walls, ceilings, trim, furniture or a shiplap accent wall.

Sage green can range from a muted to bright and crisp. Let’s explore some of the best sage green color paint ideas available to create a warm and inviting environment in your home.

Sage Green Color

Establish A Relaxing Atmosphere

Sage green paint creates a calm and soothing atmosphere in any room, especially bedrooms, and living rooms. It pairs well with neutrals and adds dimension without overwhelming the senses.

Foster A Hospitable Ambiance

Sage green color creates a welcoming and hospitable atmosphere, in addition to its tranquil qualities. Combining sage green paint with warm wood accents like rustic furniture or exposed wooden beams enhances this effect, making guests feel at home.

Develop A Harmonious Appearance

Sage green paint brings balance and harmony to any room. Its neutral tone and soft hue make it perfect for creating a cohesive look throughout your home.

Enhance With Gold And Wood Accents

Light green Sage Color can provide the perfect backdrop for gold or wood accents such as frames on paintings or furniture pieces like chairs or tables. These accents can also add texture and depth to the room while creating visual interest in places where there would normally be none.

Introduce A Retro Vibe

Add vintage charm to your home decor with sage green walls, a popular mid-century modern shade. Pair with retro furniture like velvet couches and elegant chandeliers to complete the vintage vibe.

Sage Green Color

Emphasize The Roof Design

Soothing sage paint can create a natural balance of coolness and warmth in your home. Highlight roof details like beams or trusses with this soft hue, and enhance them with gold overlays or stained wood details for added visual interest while maintaining a peaceful atmosphere.

Brighten The Space With Sage Green Paint Colors

Use light green Sage Color shades to uplift darker elements in your home, like wood flooring or window frames. It complements more delicate furniture, creating a cohesive narrative.

Consider The Ceiling

Interior designers are using light shades of sage green to add pops of color to ceilings and draw attention upwards. It complements various decorating themes, from minimalistic to modern farmhouse styles, catering to every preference.

Revamp The Shiplap

Add texture to your walls by applying sage green over shiplap boards. This easy update invigorates classic designs and is perfect for traditional and rustic homes, increasing their value while preserving their timeless feel. For a shinier look, use a satin or gloss level of finish, rather than flat or matte.

Sherwin Williams Clary Sage is a popular muted green with gray undertones. In certain lighting, it can look or a taupe. We are a big fan of this one!

Apply Sage Green Paint To A Half Wall

Sage Green Bedroom Paint

Transform your interiors with sage green bedroom paint by painting half-wall sections in different shades. This cost-effective method adds unique flare and can be used to break up adjoining rooms or along staircases, providing the desired outcome every time!

Enhance The Laundry Room

Light Sage Green Color

Light sage green paint colors often have subtle yellow undertones that can be an attractive option for nurseries, guest bathrooms and sitting rooms. Continue reading below to see a few of our favorite picks from Sherwin Williams and Benjamin Moore.

Consider adding a dark sage green to your laundry room! Sage green walls with bright accents around washing machines/dryers and windows can turn a mundane chore into an enjoyable activity, adding a personalized touch to your space.

Add Color To The Upper Wall

Use sage green to add color to the upper portion of your walls, creating a visually appealing accent and adding depth to the room.

Create A Comfortable Environment

Choose soft shades of sage green for a soothing atmosphere, perfect for creating a comfortable environment in any room.

Prepare For Rest

Use sage green in your bedroom to create a peaceful and restful environment that promotes relaxation and calmness.

Maintain A Fresh Space

Sage green is perfect for creating a fresh and airy space, especially with white or light-colored furniture and accents.

Eliminate Smoke

The light green sage color is known for absorbing and eliminating smoke, making it a great color choice for rooms where smoking may occur.

Preserve A Traditional Look

Sage green is a classic and timeless color that can help preserve a traditional look in your home, especially when combined with other conventional colors and materials.

Paint The Cabinetry

Adding a touch of elegance to your kitchen or bathroom is easy with sage green cabinet paint. This simple update can bring sophistication while maintaining a fresh ambiance. Painting your cabinets can save as much as 80% of the cost of replacing cabinets.

Best Sage Green Paint Colors

Dark Sage Green Paint

If you’re looking for versatile color options in the sage green family, check out these best paint color choices:

Benjamin Moore, Lafayette Green

Benjamin Moore, Tate Olive

Sherwin Williams, Evergreen

Light Sage Green Paint

Sherwin Williams, Livable Green

Sherwin Williams, Healing Aloe

Benjamin Moore, Sage Wisdom

Conclusion

Infuse your home with a cozy and welcoming atmosphere using sage green paint colors. The calming hue of sage green can bring happiness, relaxation, and contentment to any space with its soft tones and earthy hints. Whether you’re looking to get some life into your living room, create a wow factor in a bathroom or add accent pieces to your kitchen, sage green paint color can provide just the right amount of calming color.

Explore the various shades available to transform dull areas into something truly special!

6 Most Important Construction Site Management Tips

Being a successful construction manager requires industry knowledge, the ability to take charge, and knowing how to use resources effectively. It’s not an easy job; you know one bad mistake can ruin the entire project.

However, if you learn how to stay organized and follow best practices in site management, everything can be done without you losing your mind. Here are the six essential tips for construction site management to ensure your project runs smoothly from start to finish.

1. Have Extra Tools on Hand

A construction site manager must ensure everything runs smoothly and finish by a specific due date. One of the best ways to accomplish this is by having the right tools for the project, especially ones that help speed up the process safely.

For example, forklift extensions can be a valuable asset for a construction site manager. These extensions enable forklifts to reach greater heights and distances, easily handling various tasks and materials.

As a result, projects can progress quicker as materials are moved and placed with greater speed. This makes it essential for project managers to have extra tools during projects to help them finish on time.

2. Utilize Management Tools

During projects, a construction site manager job is ongoing nonstop. Throughout the day, they’ll have endless tasks to complete, and most of the time, they can barely finish them by the end of the work shift.

Having to gather data, conduct inspections, make sure everyone is doing their job, and report to senior managers, it is easy how a site manager can lose track of time and get lost on what they’re supposed to be doing.

However, using advanced management tools can make the job of a construction site manager ten times easier. According to data, as many as 70% of site managers believe that management tools make it easier to operate the daily tasks of a construction project.

This is why businesses must switch their management system to cloud-based software. The technology makes everyone less stressed and helps operations move more effectively.

3. Plan for the Unexpected To Happen

As every construction site manager knows, a million things happen all at once during a project. So, you need to expect the unexpected and plan for the unknown to happen.

For example, what is your plan if operations get delayed due to bad weather? How will you make up for lost time due to strong winds and heavy rain?

Bad weather isn’t the only reason for unforeseen delays in projects. Sometimes workers decide to quit, there are problems in the design, or there are last-minute changes.

As a construction site manager, it’s important for you to have a plan B and, sometimes, a plan C. This will help ensure everything runs smoothly and that you meet the deadlines as closely as possible.

4. Have a Flexible Approach to Management

As stated above, anything can happen on a construction project. So a construction site manager needs to have a flexible approach to operating.

If you’re trying to run your projects with an iron fist, you will only stress yourself out. This is especially true if you’re part of a larger project.

Research shows that larger projects take 20% longer to finish than expected. Also, many larger projects tend to go over 80% of their budget.

So, not only will you have to be flexible with time, but you will also have to be flexible with the budget.

5. Allow a Collaborative Environment To Grow in the Workplace

As a manager, you know communication is key within a construction site. If someone is not speaking about what’s happening and a problem arises, it can cause significant damage.

The best way to solve this problem is by helping your workers learn how to open up and collaborate. This helps drives efficiency and quality of the project while ensuring workers are trying their best.

As a site manager, you must be the leader when creating an environment like this. Let everyone on the project know their role and where to go if they have a problem while working.

6. Always Pay Attention to Safety Concerns

Yes, you want projects to get done as fast as possible. However, you should never attempt to cut corners.

Safety should always be your number one concern when working on a project. Not only are you protecting your workers and yourself, but you’re always protecting the ones using the building.

If you see anything concerning, you should stop the project and address the problem. Also, you should regularly conduct inspections of your workers and equipment. By doing so, you’ll be saving lives and handling issues before they arise.

Improve the Efficiency of Your Construction Projects With These 6 Tips

If you need help managing your projects efficiently, save this list. As a construction site manager, these six tips will ensure you get everything done quickly and safely. In addition, these tips will ensure every project is successful from start to finish.

6 Best Gardening Tips For Beginners

With warmer months just around the corner, gardening season is fast approaching. If you’ve always wanted to grow your own food, learn about preservation, or just want a hobby to fill your time, starting a garden is a great experience.

But, before you rush out and buy packets of seeds, a set of garden tools, and fertilizer, make sure you know what to expect and how to get the most out of your new veggie patch. You have to learn about planting, feeding and watering, and pest control, just to name a few topics of interest. Fortunately, this quick list of six beginner gardening tips can quickly get you started!

Tip #1: Figure Out What You’re Going to Grow

You know you want a garden, but have you figured out what to grow? There are so many plants to choose from, so take a few days to research the varieties available and the challenges that come with your choices. As a new gardener, stick with hardier plants that can handle mistakes so your hard work doesn’t get ruined overnight. Make sure to list out any supplies you’ll need, including a soil testing kit to ensure the PH is ideal for your seeds/seedlings.

Once you have your list, visit a plant and tree nursery to get everything you need. Try to stick to your list and discuss your choices with one of the employees for any advice they might have.

Tip #2: Pick Your Patch

You’ve got the plants, the food, the tools, and other supplies, and now you are ready to designate the best spot in your yard for planting. Whether you will plant directly into the ground, install a raised bed, or use planters, make sure the area you choose will support plant life. For instance, if you have tomato plants requiring at least 8 hours of sunlight daily, you don’t want to plant them in a shady area.

Be aware of how much space you have to work with since most plants have spacing requirements.

Tip #3: Some Plants are Picky About Planting

Unlike the simplistic gardening instructions we learned about in grade school, planting seeds and young sprouts requires more than pushing a seed in the dirt and water. The reality is some species require specific depths and soil temperatures to germinate and grow. Follow the directions carefully for each type of plant. If the environment isn’t right for planting, wait. You don’t want a surprise frost to kill off your garden before it has a chance to thrive.

In addition to planting correctly, you also need to set up a watering and feeding schedule based on each type’s needs. While grapes love water, too much hydration on your green beans could lead to rot. To help keep things straight, keep a gardening journal to help you better manage this cycle, or consider downloading an app for your phone that does the same.

Tip #4: Get to Know Pests

You’ve probably had experiences where you received some freshly harvested tomatoes and found pests had munched on some areas. This is a common problem in every garden, but completely manageable. The trick is figuring out which pests are feasting on your plants and determining which treatments are best for that specific nuisance.

To identify the veggie marauder in your garden, try to get pictures of it and go online to find it. You can also look into a mobile app can quickly analyze your phone’s picture and provide information. Once you know what pests are in your garden, you may realize they all have different treatment methods. This is a good thing because exterminating every bit of wildlife in your patch often does more harm than good. Several holistic pest control approaches will help you contain the bad actors and support the good ones, like bees and spiders.

For larger issues like hungry deer, consider using predator scent or planting extra to provide enough for the entire herd passing by your garden.

Tip #5: Feed Your Soil

When you grow plants, the soil slowly loses nutrients over time and needs a chance to rejuvenate. One way to return nutrients is to compost! Anytime you have weeds, spoiled and leftover food, and dead plant matter at the end of a growing season, put it into a dedicated composting container or area in your yard where it can break down. This will create a rich compost you can use as mulch in your garden next season. Or, consider a direct composting method in your garden to simplify this process.

Tip #6: Don’t Be Afraid to Prune

One of the most important steps in gardening is to prune your plants. This is important because plants with vines or tons of leaves could block sunlight from getting to other nearby plants. Pruning isn’t difficult, but you should learn the best way to cut back certain plants to avoid causing them harm.

In addition to pruning, don’t be nervous about harvesting too soon. Plants like tomatoes can sometimes become overloaded and need help to provide enough nutrients to all their fruits, causing smaller yields. Instead, remove some early and let them ripen in a paper bag or fry them up. This will ensure your tomato plants can keep producing to their maximum capacity throughout the season. Whatever extra you don’t need, give away to friends, families, neighbors, and coworkers!

Final Thoughts

Yes, gardening has a learning curve, but with a bit of research and dedication, your hard work will pay off. The type of garden you plan to grow will also add to the challenge, but once your plants are in full bloom, you’ll be proud of what you’ve created. It’s hard to beat such a great feeling, and that is why so many people are garden enthusiasts. You’ll find this hobby can quickly turn into a lifelong passion that will teach you important skills that you can share with the rest of your family for generations to come.